Since I’ve been dealing with something of a forced hiatus from working on the cottage due to the gas/heat issues, I’ve taken the opportunity to refocus on my own renovation. Remember that? A lot of people in my life have assumed that since I’ve taken on a whole other renovation, my own house must be close to completion. VERY FALSE. I could try to list all the things I still need to do, but it would take you like three days to read and give me a panic attack, so just take my word for it. It’s a lot.
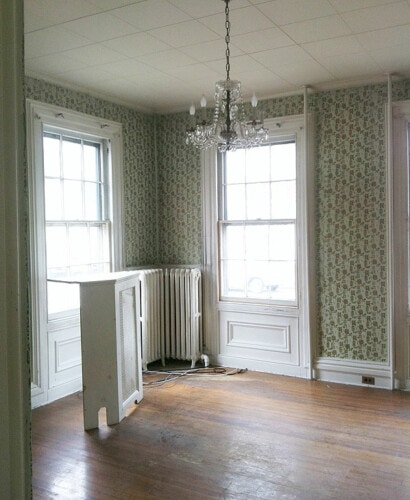
I’ve talked before about the room at the front of our house, which was likely originally a parlor. It’s the first room t0 the right when you walk in the front door (you can look at a floor plan here), and essentially rounds out the side of this floor I’ve been working on since we bought the house—first with the kitchen, then the laundry room, then the dining room. A while ago, Max and I decided that this room would be a study/library/office type space (since there’s a much larger living room right across the hall), but we’ve since sort of switched gears on that. Realistically, the “big living room” is probably a couple years off—even though I’m dying to get to it, it’s low on the priority list. I don’t want to wait that long to have some kind of space to sit and hang out and entertain, though, so I want this to be the living room for now! It’ll still house the books (or most of them, anyway), but also a couch and a couple chairs and stuff like that. I’ve been working hard to get it done-ish before the cottage drags me back into its clutches.
ANYWAY. I’ve talked about this before, but one of my big conundrums with this room was the feeling that there was something missing. The wall that the room shares with the dining room is bumped-out, and there’s this narrow/shallow little closet on the side that I’ve been informed is called a chimney cupboard, and would have been used for wood storage and whatnot. You can kind of tell from the crappy picture above (taken at our first walk-through) that there’s a large patch in the floor in front of this wall, and that the baseboard ends abruptly.
I’m not sure exactly what was here originally, but I have a couple reasonable guesses. There’s a chimney behind the wall (which has since been dismantled below the roof line, so doesn’t actually do anything), and a vent hole up near the ceiling. The floor patch indicates that there was some kind of stone hearth set into the floor here, and likely a wood-burning stove sitting on top of that. Our house was built around 1865, and since radiators didn’t come into use until the end of the century (and could have been installed here as late as the 1920s, perhaps), wood stoves would have been the original heat source. As for a mantel, it’s anyone’s guess. There’s a beautiful marble one in the big living room, but whatever used to live on this wall has been gone for a long time.
Given all of this, I had this big idea. Why not put something back in that spot? Even if it didn’t actually serve a functional purpose, a proper-looking fireplace would go a long way toward anchoring the room and providing some nice ambiance. The fireplace in our apartment is purely ornamental, but just the fact that it’s there gives the room so much. So that is what I set out to do. Fake fireplace plan: a-go.
A quick word about the fakey-ness of it all: I feel so weird about this kind of thing! I sort of think of myself as a modernist renovating an old house, and this kind of thing feels distinctly not-modernist. It’s the same feeling I get about putting up a bunch of foam ceiling medallions (which I’ve faux-aged on top of it!) or trying to recreate original molding work like I did in the laundry room. What’s so wrong with new work looking…new? Isn’t there something much more honest and authentic about just embracing all the original detail that does remain in this house, and allowing the new work and materials to just be what they are? I don’t know. I think about it a lot. But at the end of the day, I guess I want the house to seem more impeccably preserved than it actually is, for better or worse. So I’m going with it!
SO, now that I’ve written like 700 words and bored you to tears, let’s get into how this faux-fireplace party went down. It started with this mantel. Back in MAY. Yeah, this took a while from start to finish. My wonderful and insanely talented friend, John, ripped this mantel out of his house during his own renovation, but had stashed it in his basement instead of tossing it. His house was built in 1723, and this mantel was fabricated and added in the 1920s. I’d say John’s renovation sensibility is a bit more purist than mine, so he worked with a woodworker to custom build a more period-accurate mantel to replace this one (which is gorgeous, by the way). So anyway…John had a mantel, I needed a mantel, John didn’t want any money for it, I like free things…it worked out.
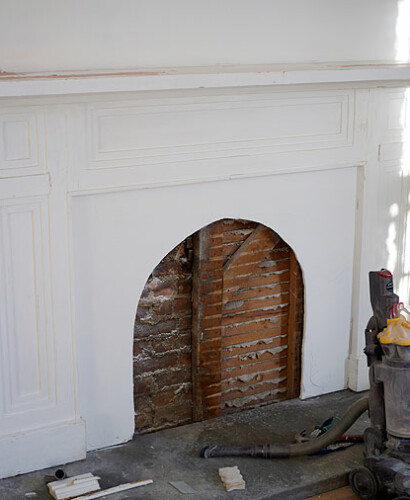
When I got the mantel home, I opened up the part of the wall where the old mantel would have theoretically been, wondering if I’d find a firebox or just the chimney. Just the chimney! Since there wasn’t any depth to work with inside the wall, whatever would go on the inside of the mantel had to be essentially flush with the wall. Hmmm. Hmmmmmmm.
I dragged the mantel into place-ish (Linus assisted), just to get a sense of how it would look and feel. Even though this thing is quite a bit newer than my house, I feel like it plays really nicely with our moldings. As you can tell from the floor patch, it’s about a foot or so wider than what was here originally, which is something I sort of fretted over before deciding to just go with. I really didn’t want to get into trying to hack the mantel down to the “right” size (I liked the proportions of it as-is), and I really liked the idea of using this mantel in particular because I had it, I didn’t have to pay for it, and I liked the whole story behind it. Something new or salvaged just wouldn’t have held the same meaning to me.
So, onwards! I removed the old patch job with no real plan about what was to go in its place, but sometimes you just need to dive in and figure it out later.
Unfortunately, this plaster wall was just beyond the point of trying to salvage. The plaster had separated a lot from the lath, it had some very significant cracks, and had undergone some failed repair attempts over the years with lots and lots of joint compound but nothing (like mesh tape, plaster buttons, or screening) to stabilize the plaster from further shifting. Even though I want to save as much of the original plaster walls in the house as possible, the best course of action here was to just start over, so that’s what I did!
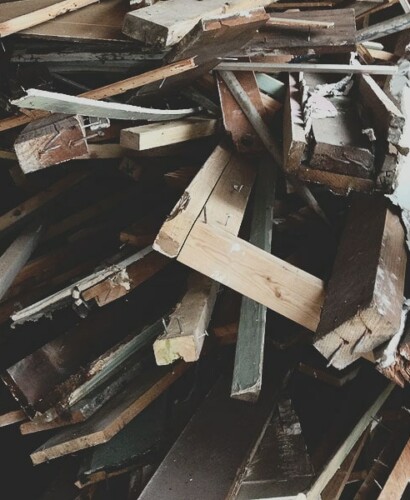
Since new 1/2″ drywall wouldn’t match the original depth of the plaster walls, I experimented with reusing the original lath strips, this time nailed directly onto the wall framing. I could have also just left all of the lath in place, but I’d already taken it down and this allowed me to still salvage the bulk of it for some other use down the road. I have no idea what to do with all my lath, but I’ll come up with something!
Putting up the new drywall was no big thing. Since the underlying framing wasn’t very smooth, the drywall wasn’t either—but I had a plan! I actually wanted it to be a little irregular to mimic the look of the other plaster walls.
I used fiberglass mesh tape and joint compound to cover the seams and screw holes. You typically do three coats of joint compound with new drywall and then finish off with a fine sanding before paint.
I wanted to experiment with getting more of an authentic plaster look, though, so I opted to skim-coat the entire wall with joint compound. I just used the pre-mixed all-purpose stuff, and I wasn’t too careful about it: I wanted the thickness of the skim-coat to vary slightly along the surface of the wall. In some places it’s barely there at all, and in some places it’s probably about 1/8″ thick.
Here’s a terrible picture of the whole wall skim-coated. The whiter spots are where the joint compound is thinner and dried faster. It doesn’t look at all like a textured wall or anything—it’s just very very subtly uneven so that it doesn’t stand out as looking flat and new. I sanded it all before painting and it really is indistinguishable from the plaster. Yay!
Ok, moving on…one of the big challenges was figuring out the material for the hearth. There were a few options here. Sometimes, like in our apartment fireplace, you’ll see a tiled hearth—but tile is tough to pull off without the whole thing looking brand new. New tile isn’t made the same way as old tile and doesn’t have the same character, so I’d either have to get really spendy reproduction tile or find something salvage. What I thought I really wanted, though, was a nice slab of honed marble. I mean, what’s more classic and pretty than marble, right? Since the size I needed was somewhat irregular (about 75 inches with a flexible depth, ideally between about 16-24 inches) I thought maybe I could find something cheap-ish in the remnant section of a stone yard.
Wrong! I took myself to a local stone place (that mainly does countertops and stuff) and found this really gorgeous slab. It was honed, it was about the right size, and it was even a little damaged along the edges and had a couple scratches, which I sort of liked. But then it priced out at over a thousand dollars, so I burst into tears and ran away. Soapstone was even more expensive, and granite was a little cheaper but still too much money, and I didn’t want granite at all anyway.
Then it dawned on me: what about good old Kingston bluestone? I suppose it’s even possible that that’s what was here originally, but who knows. I could probably find something that was locally quarried, super pretty, and much cheaper than marble or soapstone. It would reference Kingston history and even sort of tie into the exterior of the house, which is lined with bluestone sidewalks and pathways.
It just so happens that John, the same friend who gave me the mantel, worked for a couple of years as a stone mason when he first moved up here. My friends, bear in mind that this man is an optometrist. Almost 15 years ago at this point, he decided to take a break from optometry, pretty much just for the sake of learning something awesome that he felt passionate about, and I guess that thing was building stone walls and stuff. He worked as an apprentice under a stone mason named Sean Fox. So when I mentioned wanting bluestone, John knew who to call!
Sean was awesome to work with. I told him what I was doing and what I wanted, and he helped me find slabs that were good options. He also has the cutest German Shepherd named Dante, who is modeling the slab that I chose! The slab was thicker than I anticipated (Sean said that a thinner slab was likely to crack either during transport or once it was in place) and cost $400, which I figured was reasonable. I don’t know if I could have found the stone cheaper elsewhere, but at that point I was excited to have found something I liked and from somebody who understood what I was after. They had to cut the slab down slightly to fit my dimensions, and then burned the edges just a bit. I didn’t want it to look machine-cut, but I also didn’t want it to look overly rustic and rough-hewn, either. He did a perfect job, and I got to pick it up a week later.
FYI, bluestone is HEAVY. I don’t know how much this thing weighed, but I’d guess around a thousand pounds. Seriously! Sean loaded it into the back of John’s pick-up with a forklift, but it was up to me to figure out how to get it into my house and in place on the other end. Yikes! So one day, I finagled all of the people working over at Bluestone Cottage to take a break and walk over to my house to help with this thing. The whole ordeal was VERY STRESSFUL. I don’t have any pictures because I was helping and also shielding my eyes and generally terrified that the whole thing would go crashing through the floor and down into the basement and the whole house would collapse. But between about 6 guys, we were able to get it inside and into place and it wasn’t even as horrible as anticipated. I had to cut out a little more of the floor beforehand, but that wasn’t a big deal.
With the mantel in my possession and the hearth in the floor (and not going anywhere, ever), I still had to figure out how to sort out the space inside the mantel. I really fly by the seat of my pants, evidently! John actually gave me some cast iron insert parts that were with the mantel back at his house, but they were designed for a firebox and wouldn’t work here, since the wall doesn’t actually have any depth. I really needed something that would cover the entire surface and give the illusion of depth behind it without actually requiring it.
Enter: the fireplace cover! I went to one of the salvage places in town and found this big old rusty cast iron beauty. It isn’t so hard to find the arched (or sometimes rectangular) surrounding part, but the summer cover that goes inside it (exactly what it sounds like—a decorative cover to conceal the firebox in the months when the fireplace wouldn’t be in use) is a bit more rare—and finding the two together is even more challenging! I got really lucky that this one was waiting for me. The dimensions were perfect, and the detailing is just gorgeous! It’s definitely very Victorian (my house is more Greek Revival—in other words, pre-Victorian), but I love it all the same. It came home with me for $150, which is more than I wanted to spend, but after some poking around online seems to be a steal of a deal.
OK, so! Mantel—check! Hearth—check! Summer cover—check! The next decision was AGONY. What to put between the inside edges of the mantel and the summer cover? Usually I’m pretty decisive with this stuff, but this whole project seemed so full of unknowns and opportunities to royally fuck everything up and end up with something that looked super dumb and super faux and lame and I was very afraid of that happening. The idea of tile was kind of nice, but it was the same issue with the hearth—new tile would result in the whole thing looking new and kind of cheesy, and vintage or repro tiles are so hard to come by and so expensive, and I’d already spent way more money (remember, I’m $550 deep at this point!) on this project that is purely aesthetic and was supposed to be essentially free. Then I went through this long phase where I thought about doing brick veneer tiles and painting them, but I eventually got over it and nixed that idea. I became mildly obsessed with old fireplaces everywhere I went—studying them to figure out what would look authentic and be feasible, and what I landed on was a plastered treatment. You see this a lot in old houses—maybe a brick surround that’s been plastered over and painted. Often the hearth is also painted, but I wasn’t about to slap paint on my bluestone!
So anyway. More faux. I turned the mantel around, screwed a scrap piece of 1/2″ drywall in through the back, and traced the outer edges of the cover with a sharpie. The inner part of the cover is deeper than the outer part, if that makes sense, so the outside needed a lip to sit flush with, while the inside needed a little space behind the face of the drywall. I have no idea if I’m explaining this well. Then I took a drywall knife and cut an inch or two inside my sharpie line and removed the inner piece. Then I (finally!) moved the mantel into place and secured it to the wall by screwing a few 4″ screws through the front and into studs. Then I simply patched the holes (I like Ready Patch for small things like this—it sands down smoother than wood putty) and caulked the places where the mantel meets the wall. Then I just had to patch in a few floor boards and the original molding that I pried off and saved way back when I started this whole rigamarole.
Since drywall is so flat and smooth, I used more joint compound to create the faux plaster effect. I was very liberal with it—sort of slathering it on with a 6″ putty knife, intentionally creating and leaving ridges and imperfections along the way. You can sort of tell from the picture how the texture looks, but it wasn’t super evident until I got to the painting step. Anyway, once everything had about 36 hours to dry, I gave it the lightest sanding and moved on.
Because the summer cover had been sitting outside for so long at the salvage place and was covered in rust, I used this wire brush attachment on my drill to clean up the surface and prepare it for paint. These things are great for stuff like this! Then I went back in with a regular wire brush to get in the nooks and crannies of the pattern. I’d say all the prep took maybe an hour, and then I just wiped it down with a damp microfiber cloth and let it dry.
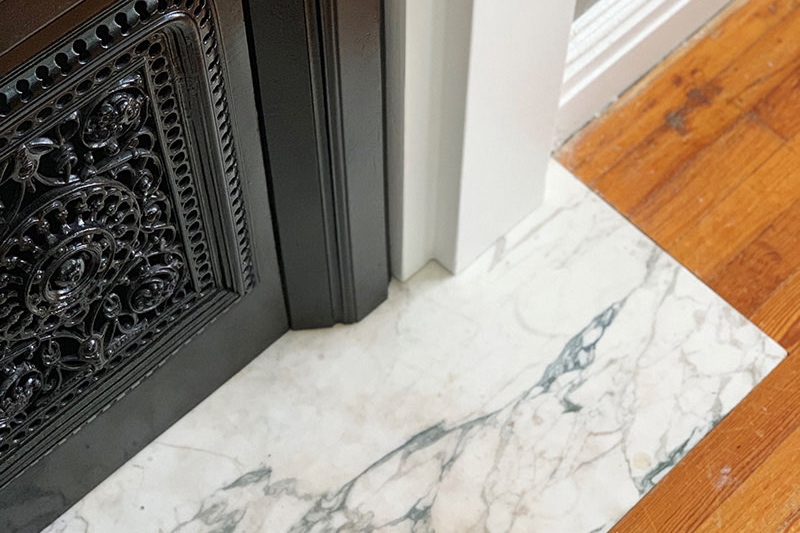
Securing the cover ended up being easier than anticipated. Before I put the whole thing in place, I painted a piece of drywall black and screwed that into the studs, so that you don’t see the framing through the holes in the summer cover pattern. Because the summer cover interlocks with the outer part, all I did to secure the whole assembly was use existing holes in the summer cover pattern. I drove two large screws into the studs behind—you can sort of see the screws in the picture above. The heads are sunk into the existing holes in the pattern, and after the paint, you have to really search for them. Nobody will ever notice except me. And everyone I tell.
FINALLY, PAINT TIME! I had about half a can of high-gloss black oil paint from the failed kitchen floor experiment of yore, and so I broke it out here. This makes the project, as far as I’m concerned. The gloss black accentuates the texture of the faux-plaster business and the intricacy of the summer cover, but I think keeps everything looking understated and classic and pretty. Oil paint is so nice to work with once in a while for small stuff like this—there’s really nothing like it. After this first coat, I caulked at the transition between the cover and the faux-plastered surround and then painted a second coat. The finish is so hard and smooth and pretty. I’m thrilled with how it turned out!
ANNNNDDDDD, DONE. I love it. I really do. It completely changes the room. I don’t feel like it dominates, but it does provide a focal point and just a certain ambiance that was missing before. And I feel like it just fits—like you’d never walk into the house and think it was added recently or even really pay a lot of attention to it at all. That’s exactly what I wanted.
I’m happy with the way it ended up fitting on the wall, too! Even though it’s a little wider than whatever was here originally, I don’t think it feels out of place or two big for the room.
I love the bluestone, but I do keep wondering what would happen if I tried to darken it up a little bit. I’m sort of afraid to touch it because I don’t want to ruin it, but I wonder if mineral oil would have the same kind of effect on this that it does on soapstone? I don’t know. I’ll live with it for a while and see how I’m feeling some other time.
I’m resisting showing wider shots of the room because it’s actually almost done! Told you I’ve been working hard. There are still a few major items to check off the to-do list, but I’m super excited about the way it’s coming together. It’s so weird and exciting to have this whole other usable space in the house! I can’t wait!