
As we get deeper and deeper into this whole home renovation/restoration exciting adventure thing, we’ve started to come around to a few basic truths. They aren’t really anything new—a collection of clichés about renovating, honestly—but somehow they never really registered before we were actually living it. Is everything dirty and filthy and dusty all the time, despite our valiant cleaning efforts? Yes. Is the renovation taxing on our relationship and friendships? You betcha. Is it more expensive than we anticipated and more time/energy-draining than we could have dreamed? Yup. It’s all true!
Learning this has prompted me to reevaluate some of the ideas I had at the beginning of all of this, especially those pertaining to the kitchen. The original concept was this:
1. The kitchen is unusable, unsafe, and super ugly.
2. Rather than tearing it all out, since we have neither the money nor a plan for how to replace it, let’s drop about $1,000 in the space on quick-n-dirty DIY repairs and cosmetic upgrades to make it cute and workable for something like the next 5 years.
3. Once this is done, renovate the rest of the house! NBD.
4. Once the rest of the house is looking and feeling fresh and fabulous, we’ll circle back to the kitchen, gut the whole thing, and redo it for real. No more crappy 50s cabinets and crappy 50s soffits. New layout with lots of prep space. Maybe an island. Maybe a couple new windows. Lighting. New floor. Fancy pretty kitchen to go with our fancy pretty rehabbed house.
The first two items on the list seem more or less realistic, and it’s pretty much exactly what we did. The second two? Maybe a little overly-optimistic.
I think we’re going to be working on the rest of the house for a long time. And when it’s feeling done, or done-ish, or whatever, I’m going to go ahead and guess that we might want to take a little breather from things being so chaotic. Maybe we’ll move on to smaller things like restoring our windows. Maybe we’ll take a vacation. A lot of things could happen, but tearing apart a fairly functional and fairly good-looking room might not be high on the priorities list for a longgggggg time, no matter how tempting the potential for the space is. There’s also the whole matter of kitchen renovations being very expensive and money not growing on trees.
Accepting that this might be the only kitchen we have for QUITE a long time, and maybe as long as we own the house (who knows what could happen”¦), I’ve warmed up to the idea of throwing a little more money down to make some improvements to this kitchen. Kitchen Overhaul Phase 1 ended up leaving some things to be desired, which at first I was very hesitant to do anything about, but now that I feel like we’re in it for the longer haul…
Remember when I made my own countertops last summer? Well. I used 2×12 Fir framing lumber (which had the right thickness but was soft and full of knots and SUPER labor intensive to sand down, since it’s framing lumber after all), which I joined with pocket holes and screws (using my Kreg jig). To achieve the right depth, each countertop had to be composed of 3 different pieces of lumber (2 full-sized pieces and one narrow strip in the back). They looked pretty good at first, and I was happy with them, despite wishing that I had better equipment and know-how to really join and plane the pieces and making them look and function as one continuous piece of wood.
First I sealed them with plain Mineral Oil and later on I coated them with some Danish Oil (note: not food-safe, but we didn’t use the countertops for cutting on”¦), but over time we found that the wood was really prone to staining, and quickly began to look dingy even after a thorough scrubbing, just as a result of all the debris being kicked up elsewhere (and carted through the kitchen to a Bagster in the backyard). Not cool.
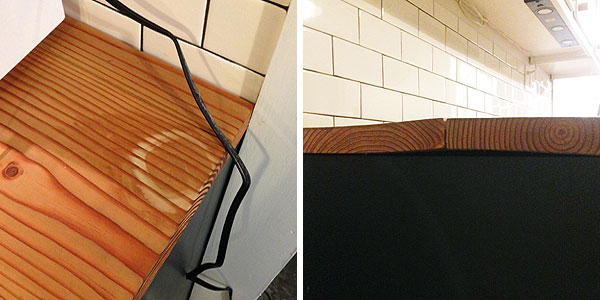
On top of that, the wood warped, the gaps between the boards widened (meaning crumbs and rice and crap would have to be vacuumed out, and even then it just looked crappy and unclean), and one of the countertops sustained a large bleach stain, making the whole countertop situation basically no fun at all.
Nope. Nope Nope Nope. These countertops were not cutting it. It was a good and inexpensive experiment—I’m glad I tried it!—but it wasn’t faring well.
We thought about replacing the countertops in three ways:
1. Investing in actual butcherblock. While this would have been nice, unfortunately it looks like IKEA has discontinued the oak butcher block I used in the apartment, and the birch is out of stock, and I really dislike the faux-butcherblock replacement they’ve started selling. Sources like Lumber Liquidators also make butcher block, but it’s significantly more expensive than IKEA’s was. Both of these options also involve lots of additional costs like shipping or renting a vehicle to transport them, and it just wasn’t an option money-wise. Even if it were, I’d still be hesitant to install something so expensive and specific to this kitchen, and probably not reusable if/when we do tear it out down the line.
2. Revisit the original laminate countertops, which we still have. One of the ideas I had longggg ago was covering the original counters in a concrete finish I’d read about online. It appears all the bloggers are doing this now! It’s supposed to be relatively quick and easy and good-looking and durable. This was probably the cheapest option. BUT when concrete was on the table, that was also when I was considering a plywood plank wood floor, and I felt like replacing our countertops with concrete would make the room feel too cold and sterile and sad. It needs the warmth of the wood countertops, I think, to feel balanced and right.
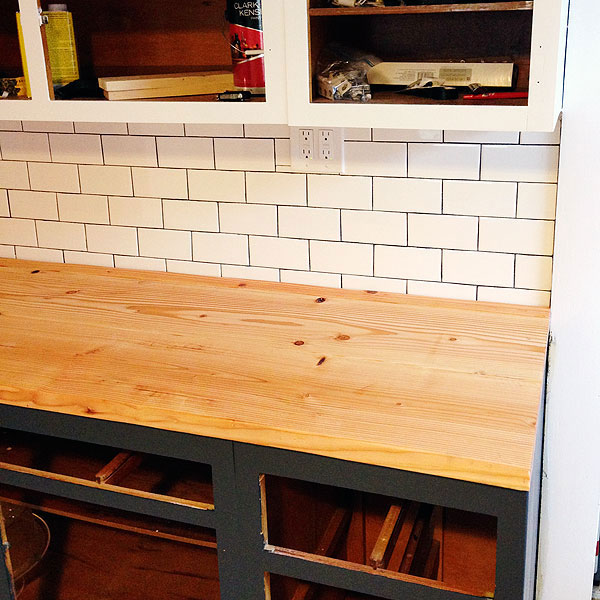
3. Try another DIY option for cheap wood countertops. I’d just used these wonderful cheap pine panels for the desktop in my office, and to my great excitement they were available in a 24″ depth! So that’s what I did:
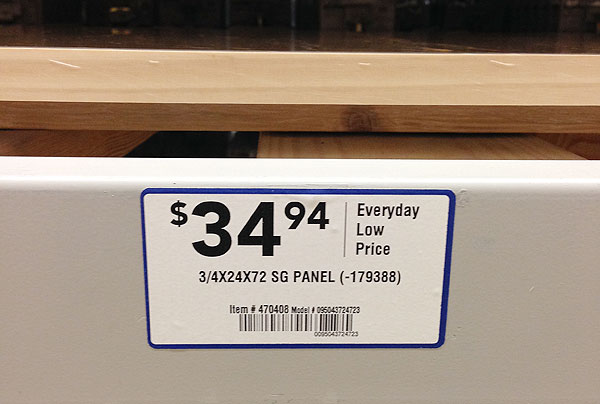
I went to Lowe’s and bought two of these! Then I went home, chopped them to size with my circular saw, screwed them in from underneath, face-nailed a 1×2 to the front and side, filled the holes, sanded, and applied three coats of water-based polyurethane. EASY-PEESY. And sooooooooo much better.
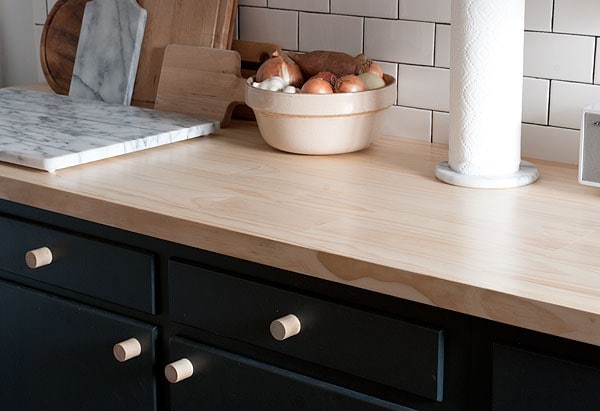
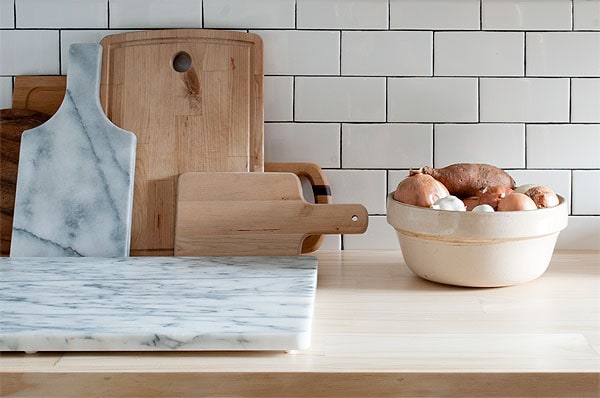
Aside from being much better looking (I prefer the blonder tone of the pine, and they now match the little pine dowel knobs!), the poly resists water and staining like a champ. We still don’t cut on them (we have cutting boards and a small area of butcher block by the stove for that), so I think they’re kind of perfect! They also lowered the countertops about 3/4″, which in turn makes the tiling job look better since I had to start the tile at cabinet height instead of above the countertops because of the height of the upper cabinets. Win-win! I’m super happy with this solution, and only spending about $80 on new countertops felt reasonable. We might reuse the old ones as shelving in the pantry or something”¦I’m not sure yet.
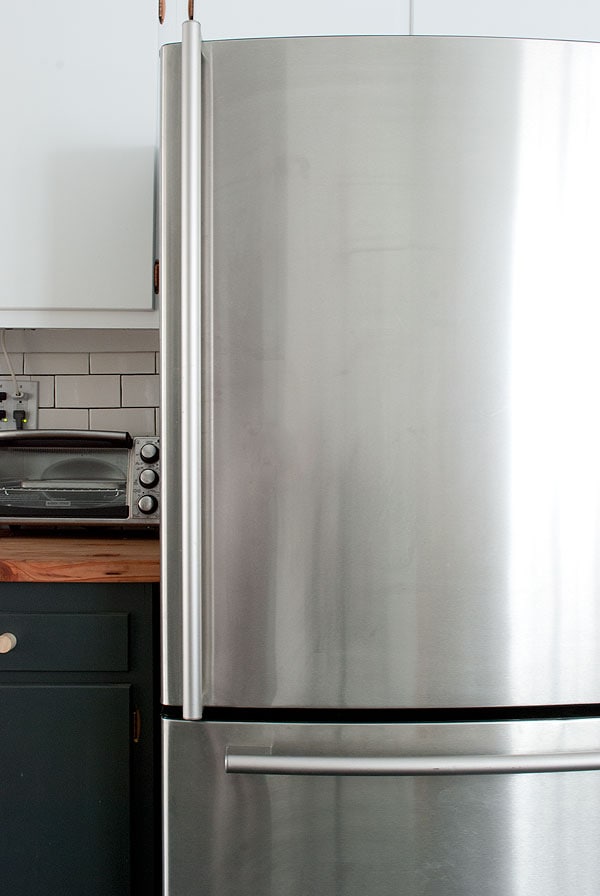
This is sort of old news, but we were also lucky enough to get a new fridge!! After about 7 years of use over at Door Sixteen, Anna decided to replace this large stainless steel LG fridge with an adorable little Smeg (which is perrrrrfection in her kitchen!), and the logistics of getting the old one out of her house were sort of complicated. As it happened, my parents had just sold my childhood home and were sending a moving truck of crap up to Kingston (some furniture, lots of boxes of my stuff, etc”¦) on the same day that Anna’s new fridge was arriving, so we asked the movers to make a quick pitstop in Newburgh to pick up the old fridge on the way! Anna very kindly refused to let me pay her for it, which is ridiculous, but I’ll take it!
(I forgot to retake the photos post-countertop-replacement, so you’ll have to use your imagination!)
There wasn’t really anything wrong with our old fridge, admittedly. It was about 10 years old and a totally fine, standard Frigidaire model, but we had space for a larger one and I wasn’t about to turn down a free upgrade.
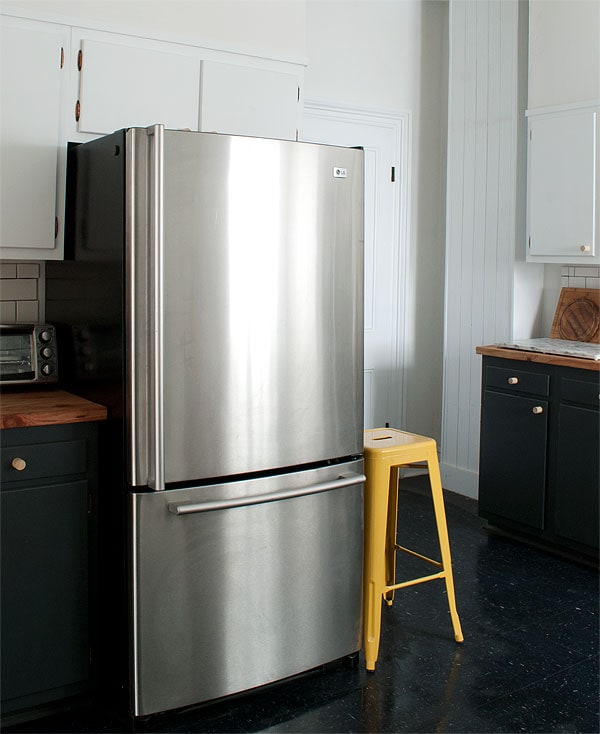
This one is a bit newer, works beautifully, looks nice, has a few features that higher-end fridges tend to have, and sucks less power. I’ve never had a fridge with a bottom pull-out freezer, and I have to say I’m a total convert! It’s really nice to have the refrigerated section at eye level. I love it. (thank you, Anna!!)
We still have the old fridge (our friends encouraged us to put it in the basement and keep it for big parties and stuff, but as far as we got was moving it out to the mudroom), but I think we’re just going to try to sell it for a couple hundred bucks and see what happens. I can’t imagine really needing it, and even a little bit of cash for it would be nice.
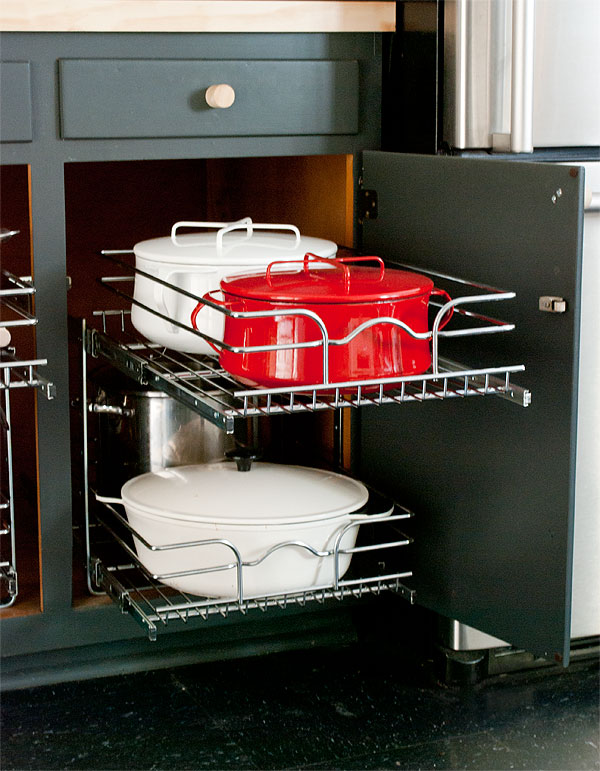
Since we were on a kitchen improvement kick, we also made some upgrades to the base cabinets. The base cabinets in our kitchen had one half-depth stationary shelf, and organizing pots and pans and bakeware and appliances and whatever kind of immediately turned into a huge jumbled mess. It wasn’t a huge problem, but more like a day-to-day annoyance that made me feel shitty about the state of things. It was hard to find anything and hard to develop a good organizational system.
WELL. Lowe’s also sells these fabulous Rev-A-Shelf cabinet organizer things, which are terrific. It was easy to remove the half-depth shelf with a hammer (they were just nailed in with some side supports), assemble these drawers, and screw them into place. The whole thing took maybe an hour from start to finish. The Rev-A-Shelf components come in all different sizes to fit standard cabinet openings, and the quality is excellent and have completely made the kitchen feel a million times more organized and functional and easy to use. Outfitting 6 base cabinets with them (5 sets of drawers and one for pull-out trash and recycling) was definitely a splurge that I still feel a little funny about, but honestly? No regrets. They increase our storage space, and they really took the kitchen from feeling like “eh, good enough” to “wow, I could see myself cooking in here for as long as my heart/bank account desires.” They’re still cheaper and farrrrr less invasive than buying and installing new cabinets, but functionally do the same thing. I’m so happy with them, I can’t even stand it! Total organizational high.
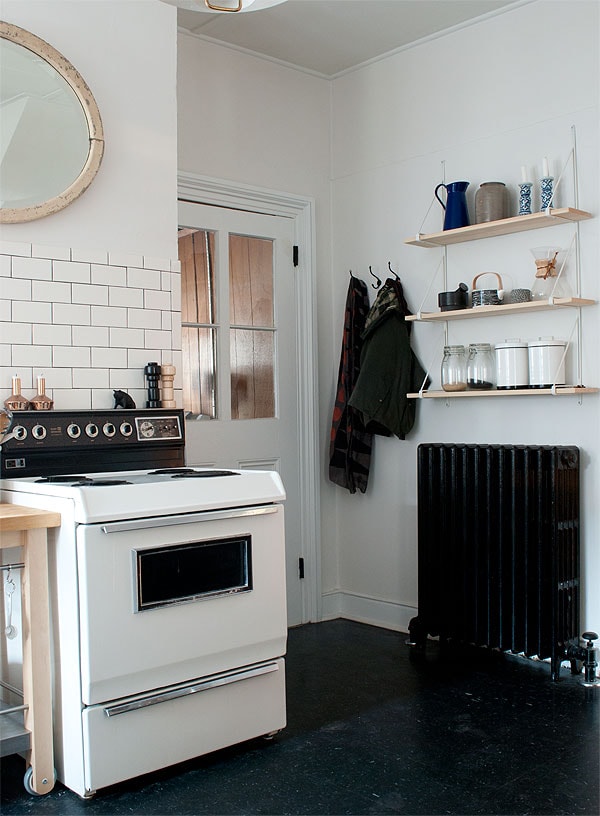
After a lot of pestering from Max, I installed a few hooks to the right of the door to the mudroom for coats and dog leashes and whatnot. I took them from our closet upstairs, so they were free, and attached to the walls with some plastic anchors and black screws. They’re nice! They’re handy! They’re old!
I am getting reallllllly tired of looking at that faux-wood paneling and general despair through the door to the mudroom. I know it seems like we have a thousand projects on the go, but I’m so fed up with the mudroom that I might be bumping it up the priority list. It’s a big space (about 9’x10′!), and with a little TLC I think it would be perfect for tool storage and project building. The tool situation has kind of ballooned out of control and I’d really love to have one space to keep all of it—right now it’s scattered around the house, which is mega-impractical and inefficient and makes it impossible to keep organized. I keep setting up shop in other rooms in the house, which in turn gets sawdust and mess EVERYWHERE, and I want that to stop”¦particularly since we’re hoping to be renovating those other rooms soon. I don’t want to do this in the basement because it’s creepy, there aren’t any outlets, and I don’t want to impede access for plumbers/electricians, and I don’t want to do it in the garage because right now it’s literally FULL of construction debris and garbage (shammeeeeee) and it also would require a trip outdoors to get whatever I needed, and in the winter that’s going to be hugely annoying and uncool and hard to maintain. A garage workshop sounds nice someday, but not while we’re in full-on renovation mode, where we constantly need tons of tools on hand and ready for service. The mudroom definitely deserves its own horrifying post, but I’m starting to formulate a plan”¦which may or may not be realistic and may or may not be cute. We’ll see! It’s kind of a complete and total wreck and honestly might get torn down completely someday, but until that time I guess it makes sense to spend a weekend sprucing it up and making it a usable space.
ANYWAY.
Now that Kitchen Overhaul Phase 1.5 has seen us replace the faucet, the countertops, the fridge, add some much-needed organizational things, and a few hooks, I really feel settled in this kitchen for a much longer haul. Moving forward, I’d love to add a little sconce over the stove (I’m in love with the Radar Sconce from Schoolhouse Electric, and I think it would look great there”¦), and”¦get a new stove. I actually don’t mind the way this one looks AT ALL and it functions admirably well for a cheap appliance probably pushing at least 40 years old, but it seems like anything we put in the oven comes out charred and unevenly cooked, which kind of sucks. Now that we have a functioning gas line (we didn’t when we put this stove in, which we took from the now-defunct upstairs kitchen in the house), I’d really like to switch to a gas stove/oven. That’s definitely not happening now, but just maybe if I found something really discounted on Craigslist or something, it would be worth it. I guess I’ll start looking, just in case…
I’m really glad we did all this stuff, especially since small-scale improvements like this can really increase the longevity of a space. I can stop obsessing about all the things I’d do if I had 20K to blow on a kitchen renovation, and move on to the stuff that really needs attention! Those ceilings aren’t about to drywall themselves!


This is the first time I’m seeing my old fridge in its new home!! It looks SO much better in your kitchen than it did in mine. It’s really meant to be in a run of cabinets like that. Yay!!! I’m so happy you guys were able to take it instead of it going to some random Craigslist person.
The new countertops look GREAT, by the way. Totally the right decision. I’m now obsessed with those panels, too! I want to put panels on everything.
Thanks, you! I need to make you a new section of countertop!! Send me the measurements! The panels are great. Nothing fancy, but for the price…
I gasped when I saw the title of this post because your kitchen renovation remains one of my favourite renovations ever, but of course I should have trusted you, it’s still beautiful just better! (Er, long time reader, first time commentator :)
Thank you, Louise! It’s totally the same, just a little spruced up. No major changes for a longgggggg time!
Your kitchen renovation still remains the most jaw-dropping before and after I think I’ve ever seen. I made my husband sit and look through the whole thing when you first posted it. He was also mightily impressed.
New counter tops are awesome! Love it!
Since you complained about the last ones warping though you might look into adding a ‘breadboard’. (There might be another name for it). It’s the piece of perpendicular wood carpenters add to the end of a tabletop to keep the boards from warping.
It’s the one iota of information my woodworking father/grandfather passed along that I’ve managed to hold on to.
Looks wonderful though!
Thanks, Loren! I actually think the 1×2 on the front will help, but mostly it’ll help that the panel is screwed into the cabinets in lots of places underneath! That’s more or less how I secured the piece of plywood on my fauxdenza and it’s been going strong for a few years!
Where did you get those beautiful enamel dutch ovens?
They ones on the top shelf are Dansk Kobenstyle! Vintage ones are all over eBay, and they’re sold new at Crate & Barrel and maybe some other places. We found one very discounted at a Crate and Barrel outlet, and the red one very very discounted at HomeGoods, of all places! They’re wonderful, and the top doubles as a trivet!
The one on the bottom shelf is IKEA. It’s the nicest piece of cookware I own—the quality is basically the same as a Le Creuset dutch oven, but $50!
LOVE the new countertops!! you really can’t get better than that for like $80. and i’m super bummed to hear that IKEA discontinued the oak butcher block”¦ boo!
I know!!! Maybe it’ll come back. It was so, so nice!
My apartment has the same stove/oven and everything I tried to cook ended up burnt too. Finally I got a cheap-o oven thermometer and it turns out that the gauge was 70 degrees off. Now I just set the dial lower, check the thermometer and (ta-da) no more burnt dinners!
Ya’know, why didn’t I think of that?? That’s probably exactly what’s going on, but it didn’t occur to me to buy an oven thermometer and figure it out. That would definitely help the situation.
Don’t use one of those bi-metal thermometers. They’re often pretty inaccurate themselves.
Also, electric ovens tend, on the whole, to bake more predictably and more evenly than gas ovens. So if (who takes my baking seriously) I were considering upgrading my stove/oven appliance, I would stay with an electric oven.
On the other hand, cooking on a gas flame is much nicer than on an electric coil, because the flame is much more responsive. But then I tried a nice induction cooktop ”“ which runs on electricity. I’d bet you’d love cooking via induction ”“ unless you were already seriously invested in and committed to copper and aluminum cookware….
I am so jealous of your cabinets being in good enough shape to refinish. The original 1960 cabinets are in my kitchen, but they have been trashed. The lower cabinets are literally rotting apart from a long term leak in the garbage disposal the previous rental tenants were too lazy to ask to be fixed. One of the previous owners threw away the doors for the uppers when they painted all of the cabinetry with super cheap latex paint. I cannot bandaid my kitchen enough to make it a place I want to be in. It makes me sad.
Merp. Yeah, we got lucky that the cabinets were in such OK condition, even as the floor was literally crumbling under our feet! There’s some water damage to the sink cabinet and door fronts that I was able to remedy-ish with some patching compound and paint, but otherwise the cabinets are pretty solid and fine. Sorry yours aren’t better candidates for an easy fix!
Freecycle that fridge (don’t know if you have it in the US – offering stuff for free online). You got yours for free so you could pass yours on to someone who needs it. We got some G-Plan wardrobes for free – also gave away a load of our old kitchen. Trash or treasure.
Hmmm”¦I’m sure there’s something like that here, although honestly I could EASILY give away the fridge for free to someone who would happily take it to be scrapped and pocket the cash. There’s a big thing up here, at least (it’s what we did with the broken stove and the drop ceiling framing”¦). I’d rather just sell it for cheap to somebody who will use it (it’s functional!) and have the money to spend on drywall or something. :)
Freecycle is everywhere! I used to be on it here in Aus but found it can be hit and miss- you are the one who selects who it goes to, on the other hand that person might be lying to you. I guess there is a Craiglist free section so it’s a bit like that. But scammers aside, there’s a good chance you could be giving it to someone who really doesn’t have any dough and needs a good fridge, or any fridge at all… good vibes can be found in giving things away. Like Anna, giving you a lovely fridge. Good vibes.
Lovely countertop solution! And a very timely update, too. We’re in the process of purchasing a house with truly lamentable counters, and in anticipating a lengthy renovation process, a cheap short term solution is much appreciated. I’ve filed many of your projects away for reference over the last couple of years, and this is no different.
Looks great! I wonder if I can do those for my apartment, I HATE the laminate countertops we have, but I do not even own a saw, so I am not sure if I can pull that off. I need some handy friends.
Why don’t you start a registry/wishlist for your new home, friends and followers can get you things for your home maybe. It would be kinda fun to see their gifts being incorporated into your design.
You probably could if you cut the wood to size at the hardware store, although face-nailing the 1×2 to the front might be challenging without a nail gun. But where there’s a will”¦
People suggest that sort of thing to me once in a while, and honestly it’s just not something I’m comfortable with! If anyone I know (or don’t know”¦) feels compelled to help make somebody’s home a better place, there are lotttsss and lots of organizations that do that for people more deserving and in need than me!
Did I miss when you installed the cute peg knobs? Did you make those yourself? I love them!
Seconding the question on those lovely dowel drawer pulls. I searched your whole site and I can’t find any tips for making them. Halp? I’m guessing you drilled holes in them first, then screwed them in from the back of the cabinet doors? Did you coat them with poly, or just leave them raw rood? They are wonderful.
Yes, I made them! DIY coming soon! :)
Looks great! Really like the new countertops.
Since this is a kitchen post, I figure this is a good place to ask this. I have literally the same sink as you and it’s really tough keeping it white. I’ve tried bleaching it before but the grime comes back after a few months. Any tips or products to try?
I usually clean it with Barkeeper’s Friend! I don’t think you really want to be using bleach or other hardcore cleaning products like that on enamel, since it will erode the finish. Some deep-set stains might not go away (patina!) but I love Barkeeper’s Friend or Bon Ami just for regular cleaning.
The kitchen looks great. I also want to thank you for reporting back when projects don’t work out as hoped.
I’m digging the new countertops, Daniel!
Definitely sell the fridge and pocket the cash and/or apply those funds to another home purchase (cough wine fridge cough).
Wine Fridge!! hahahaha. How about”¦buckets of joint compound?
Hi Daniel!
First of all, I wanted to apologize if I was entirely too excited to run into you today! It was like running into a celebrity! My boyfriend has never seen me clap like that!
The new counters are amazing, the lighter wood is so nice:-) I cannot wait to see how the rest of the house unfolds!
No apologies!! I love when people stop to say hi! It was so nice to meet you, and thank you for the kind words! :)
Mmm mmm MMM. We love our rev-a-shelf. Didn’t know we NEEDED it until it was installed. Now dishes are washed in a timely fashion and put away. CRAZY. Enjoy ’em. I’m jealous you have FIVE.
I know! It started with two”¦and then two more”¦and then another one”¦and then a pull-out trashcan”¦it just makes EVERYTHING BETTER.
So I’ve been looking into the Rev-a-Shelf (my new apartment has those same weirdo half shelves in the bottom cabinets…they are suriously confusing.) In your research did you find anything similar that was free-standing? I desperately want these for organization’s sake, but I don’t think my building would be happy if I sunk screws into their 2 year old cabinets.
I just literally cannot find a similar free standing option for pots!
Love the new countertops btw, agreed that the lighter pine ties everything in together!
Oh p.s. I’m the girl from Northern VA who emailed you way back about “good brass and bad brass” (not that you remember…) BUT. My grandma gave me her old school faux bamboo brass floor lamp recently… and it is AMAZING. If it wasn’t literally 50 years old it would be an identical knock off of this Jonathan Adler lamp: http://www.jonathanadler.com/meurice-floor-lamp/?cat=1005&initial=4126
I immediately thought of your blog!
Long time reader. First (or is it second?) time commenter WHERE did you find those delicious dowel knobs?!?!?! I will kill for 6 of them! My fauxdenza would as well.
Oh, they’re exactly what they look like—just simple pine dowels that I sawed down, sealed, and attached to the cabinets! I wasn’t sure how well they’d fare when I first finished the kitchen, but they’ve been great! I’ll put together a little DIY post for them super soon, promise!! :)
Thanks!!! Looking forward to the post. :)
Peel and stick window frost to the mudroom door. Ta da no more ugly in the kitchen!!
Dan, liked when you did the kitchen the first time (a month or 2 ago, I tore through your blog, reading many of the back entries).
Definitely an improvement over what you had to start with, that’s for sure, and the new updates improve in that, even if in more subtle ways, like better inexpensive counter-tops, and the pull out drawers. My late mother had the cheaper versions of these drawers in her rental of many years and they were great.
As to the mudroom, I’d go simple, paint the walls/ceiling white, add white vinyl flooring, or something cute and colorful, but easy to clean, add a weatherproof rug for between the backdoor, and the kitchen door to catch mud/snow/rain before it gets tracked into the kitchen, add a bench to take off wet/muddy boots, and a tray to let them dry on that can also catch the water/mud, and can be easily cleaned/hosed out when needed. Add shelves/drawers for tools, a bench for your chop saw, a couple of good shop lights, and call it a day.
This way, it’s functional until you can do something better down the road.
Just my opinion. BTW, love that fridge and your blog is giving me ideas on my eventual new place (I’m buying my first home).
Good luck to your work on this old home. I hope I don’t end up with a place this old, but perhaps a home from the mid century era or so instead that just needs a bit of updating and TLC to boot.
Looks fab as pretty much everything else you have done. Could you adopt me? I’m pretty good at renovating stuff, I love dogs and I’m also charming and funny!
Sometimes the smallest changes make the biggest differences, that new counter top really matches the cupboards underneath so well. I also love that fridge, it’s so huge compared to what we’re used to over here! What dimensions does the thing have?
Any plans with the hanging cupboards? I find the stainless steel going very well with the darker lower cupboards, but I’m not completely convinced of the white…
I also looked up that Kreg Jig thing, as I’ve never heard of it before, and OMG how easy it makes things look! Now I want one! Now I’ll need to cross the pond!
I’m in pretty much the same place with my kitchen! It was last renovated in 1936. But, with paint, new flooring, and freestanding furniture, it has turned into something that I can use for a long time. I’d love to do a full renovation, but the rest of the house needs so much work that I don’t ever see it happening!
Daniel
I love what you’ve done to the kitchen — makes it so much more functional. Small yet very smart changes. I’m going to (steal) use your idea for new counter-tops in a kitchen renovation I’m doing to my small house out in Wimberley TX. Thanks so much for posting. I love your blog.
You’ve done such a spectacular job with this renovation that I’ll actually be really sad when, many moons from now, you post about a full kitchen gut. Everything about this is perfect. Are those cabinet organizers screwed into place, or can they be lifted out for cleaning?
Daniel, just thought you’d like to hear from someone who did this a couple years ago. My husband and I are renoing an 18th century PA farmhouse, so although we bought nicer cabinets for the kitchen (we were starting from zero, so nothing to salvage), we did use those wide shelving boards from Lowe’s for the countertops. I’m saving my pennies for soapstone or honed marble. I change my mind daily. Anyway, we did a dark stain on ours and then sealed them with a few coats of Waterlox. I have to say they have held up really well and we get TONS of compliments on them! The only issue I’ve noticed is that in the winter when everything is super dry the 1x’s on the edges tends to pull away at the corners, but I suspect this is because we have a forced hot air system in the house. Otherwise they have been great – not cold-feeling and give the kitchen character. I am tempted to keep them for the long haul!
Katie, I’m super interested in the Waterlox! We have a rental kitchen with no countertops (literally, no countertops!), so I’m looking for affordable solutions and obviously Dan’s is the way to go–except that I do want the sealant to be more water-resistant than regular polyurethane. How long have you had the Waterlox-finished counters, and have you had to reapply the Waterlox yet?
Daniel, the new counter tops are brilliant! I think it’s so inspiring how you constantly update things so incrementally, having lived with the space to see how it works, and so on. Agree with Max on those hooks – I need some for my hallway to solve the coats-hanging-on-door-handles problem.
You know, I’ve always been SO GLAD that you don’t have 20 thousand to spend on a new kitchen. I have seen so many renovations where I could only shake my head, thinking: what these people could have done/had/experienced with all that money, and instead they tore out a perfectly good kitchen, and have replaced it with something dull and already dated looking. Most of these kitchens really only needed one thing: a damn good clean! Well, that, and some plants.
On the stove/oven problem: what kind of oven dishes are you using? I have an electric oven and have noticed everything seems to cook better when I use stoneware or glass, whereas metal pans in the oven seem more problematic because they overheat. I agree that an electric oven is better than gas though.
You guys should think about having a break when the weather gets better. Just stop everything for a week, invite friends over to eat, and then go out dancing in Kingston!
Not before you’ve planted some nasturtium seeds though – they would look great on your front porch in clay pots, and they bloom all summer long, with no maintenance. Except water, of course. Nasturtiums always looks so cheerful: instant colour, instant happiness!
I am really enjoying your blog. I have the same cabinets with that useless half shelf. Thanks for the tip! I’m totally on it.
The new countertops look awesome! And yay, new (to you) fridge!
The new countertop looks fantastic! I’m sold. Curious what brand and finish of water-based polyurethane you used? It looks like it has a little bit of a sheen to it. Also, did you sand/poly in place after you installed them?
Thanks! I used Minwax Polycrylic in Satin, which does have a nice sheen but definitely isn’t shiny. And yes, sanded and poly’d in place, after it was assembled and the holes were filled. :)
But my deah, deah, boy!
Do not, I repeat, DO NOT get a gas oven! While cooking with gas is absolutely the bee’s knees, baking with gas is evil incarnate! No seriously, gas is great for cooking – it’s direct, it’s fast, one can judge the heat by sight and sound of the flame – it’s just all round wonderful. The gas ovens I’ve had to use in the last ten years left everything charred on the bottom and undone on top. Additionally there was a sort of danger zone in the back where everything turned into charcoal instantly.
Recently we got ourselves a nice modern appliance from Italy with gas stovetop and electric oven – absolute bliss!
Hi Daniel! Do you think something like this would work for around a sink too? Or no good for near water?
Hmmm. I think it would probably be OK with the right sealant, like maybe Waterlox or something for exterior applications, you know? Not sure!
This kitchen is like a phoenix that rose from ashes and continue to get ever more beautiful with your every tweak! Serious envy of your mad skills!
Radar sconce! It (and the SMEG refrigerator) are going on my wish lists!
Daniel, Get a nice dual fuel stove/oven combo- gas cook-top with lower electric oven. We got a nice Kenmore at Sears at it has been terrific, except for the digital panel, which I would advise keeping away from on any major appliance.
I’m sure you have even more spectacular ideas in mind, but I think it looks fabulous now.
Your talent with cheap materials is amazing, Daniel. That kitchen looks so light. I just remember the horror it was in the “before” photos (sorry about the reminder, you’re probably trying to forget). I can understand why the mudroom is such a depressing sight, and I hope you get the time and energy to turn it into a decent workshop.
When it comes to replacing the stove, I have to agree with Pericolosa, Florian and Jeffrey. Baking with gas is bad, bad news. As a European, I’m always surprised at the lack of variety in stove offerings in the US, though it is getting better. Bertazzoni do great stoves that look like catering models for much less than the better-known brands. Ideal would be an electric *double* oven (smaller top oven, large lower oven, both with fans) with a gas cooktop, but I have never seen anything like this on the market as a freestanding model in standard width (though you can get part of that combination in electric-only). The only way to do it seems to be to get an electric wall or built-under oven and a drop-in gas cooktop, but you probably don’t have the space, any more than I do. *Sigh* – my dream is the Gaggenau EB 388 oven, but I would have to give up half my living space to fit it in my kitchen, as well as run new wiring at huge cost. Until I win the lottery, it’s staying on the kitchen tearsheet.
You know, I never knew this about gas ovens! Turns out I’ve been cooking with electric ovens/gas cooktops most of my life, and just had no idea! When the time comes, that’s probably what we’ll buy. I actually think that kind of setup is pretty normal (according to my mother, haha). I think the biggest issue with our oven is probably just that it’s running too hot, so we’ll get an oven thermometer and hopefully that’ll solve it. I don’t love cooking on an electric cooktop, but I don’t really mind it, either”¦I mostly just worry about damage to my enameled pots and pans, but hopefully that won’t be an issue.
I love this blog! Just as an FYI/future reference. Lumber Liquidators sells great butcher block that’s cheap as well. It’s not as cheap as IKEA but it comes in 8ft and 12ft lengths, but if you are just buying for a kitchen it should be affordable i think :)
Thanks! Yes, I actually looked into the Lumber Liquidators option both when we did the countertops the first time and when we redid them! They are pretty affordable, but they’re just too much $ for us to spend right now, and I really don’t like the idea of those pieces of butcher block going to waste if/when we really renovate the kitchen (or feel tied to making those dimensions work in a redone space”¦). I really think these countertops will be great for a very long haul. I’ll of course update if that turns out to not be the case!
Just FYI: Danish Oil (at least the Watco version) is food safe when fully cured.
Perhaps you had a different type of danish oil (but they are all basically the same), but as long as you let it fully cure (might take a couple days for thick, pourous woods), it is regarded as a suitable finish for wooden cutting boards.
Also, if you are looking for another butcherblock source, try McMaster-Carr. Not as cheap as ikea, but they are actually real Boos Block and available in a bunch of different sizes. The oak ones are only available with a kind of ugly edge, but maple has a straight edge.
http://www.mcmaster.com/#countertops/
Your countertops look fantastic! I’m going to try to build them in my home. Are the 1x2s placed at the edge (in front of) the counter or underneath the counter? Did you seal the seams or use wood filler or just poylurethane the whole thing? Thank you!
Thanks! The 1x2s are at the edge, not underneath! I did use a little wood filler but I found that wood glue mixed with sawdust and sanded once dry was a better match if you aren’t staining.
I know I’m a little late to the party, but I’ve been enjoying reading through your archives on your house renovation. I love you writing style, and I love the house that you’ve purchased. Obviously it’s a lot of work, but I love old houses, and this one is definitely cool!
I just wanted to chime in with a suggestion for your stove: I’ve been using an electric oven for several years, which is not my preferred appliance. However, I’ve found that keeping my pizza stone in there on the bottom rack helps even the temperature out so that things don’t burn as easily and are cooked more evenly. Also, (and forgive me if you already know this) you can check the temperature of the oven with a real thermometer and you should be able to adjust the setting dial to show the correct temperature (pop it off and there’s usually some mechanism for adjusting where the knob sits on the dial). Those two things have made it so that I can cook much more easily in cheap electric stoves…
Keep up the awesome work! I can’t wait to see more!
What type of flooring did you use? Your blog is amazing, and a true inspiration for a Brooklynite and soon-to-be renovator!
The kitchen we’re moving into has floor to mid-height subway tiles and one wall of original cabinetry…the flooring unfortunately (or fortunately?!) needs a real face-lift. Your kitchen reno is a real inspiration! Beautiful things can happen in Brooklyn, and on a budget.
Thanks, Valerie! The flooring in this kitchen is Tarkett brand black VCT (I think the color is called Midnight”¦), purchased at Lowe’s. It’s the same flooring used in hospitals and schools and stuff—very hard-wearing and durable, super cheap, and relatively easy to install. You do ideally want a very flat surface to put them on, though—preferably a plywood subfloor where the cracks and screw holes have been sealed and leveled. I’ve seen people put it over sheet linoleum or other lino tiles and it seems to fair OK too, though. You can read more about my (mess of an) install here!
Totally stealing your countertop idea! They are FAB! Love the lightwood tone. Just gorgeous.
Hi there. I’m nearing the end of a restoration in Morocco that has taken an insane amount of time and more money than I ever want to add up (ignorance really is bliss sometimes; i just stopped counting a couple of years ago).
My contractors are not at all fans of timber countertops but I popped into a lumber supplier this morning and given what I can get the timber for, I’m tempted to give this a shot and was very interested to read your original post and the update.
So my question is this: you mention that the second version was sealed with polyurethane and has resisted water and stains better than the first… Do you think you’d have been happy with the first benches if you had sealed those with poly? Or was the type of timber a factor?
I can get slabs of whitewood about 5cm thick by 20cm wide and up to 4m long for as little as EUR30 each (so something like EUR90 for my entire bench), so it’s pretty tempting to give this a shot.
Thanks, RK! I think the bigger issue with the first countertops was actually the gaps between the boards, not the finish. If I had the equipment to really biscuit and join the boards together to make a seamless surface, that would have definitely changed things, but my “joining” method left small gaps that could trap food particles, allowed any spills to seep right through into the cabinets below”¦yikes!
Love your ideas! In fact, maybe too much. I saw the original post and fell in love with the idea of the wood plank counters, but didn’t ready carefully through the subsequent link. I’ve already purchased the lumber and started jigging them together. I had planned to just use mineral oil and beeswax, but seeing your photos, I’m rethinking. Do you think there is anything else you could have done in the finishing that would have extended the life of the originals? Perhaps I’ll go a bit more aggressive with a Waterlox or poly finish. FWIW, we don’t have a great deal of subsequent remodeling as you did, but we do plan to use them around a sink.
Thanks for any suggestions!
Hi Shane! Yes, a stronger finish like Waterlox would definitely help, but the biggest issue with the old counters is the gaps between the boards, I found. If you have the tools to really join the boards together to make a seamless surface, I think this would be great! If not, you’ll probably wind up replacing them like me. :)
Love the idea of DIY countertops. We’re trying to get by with new countertops for only a couple hundred dollars. A couple questions…
1) Could you have stained these darker if you wanted? If we do a wood look, we’ll probably go darker.
2) Do you think a sheet of Formica could be laid over these so that the wood forms the base but we can achieve a stone look?
Thanks!
1. Yes! The panels are stain-grade, so they can definitely be darker if you want!
2. I don’t really know anything about Formica install, but I *think* you’d just want to lay that over plywood!
The new counter tops are brilliant!.
hey daniel…
i’m waaaay belated in commenting on your post and also from the looks of your resent renovation project, it appears you have much on your plate. i just can’t help myself, however. i’m so curious about your dowel knobs…but couldn’t seem to find your write-up about them. if you did go into detail and i somehow overlooked, apologies! if not, when possible, could you let me know how you mastered the purest looking knob around?
thank you for the inspiration!
emily
Hi Daniel,
I’m getting ready to overhaul a kitchen and this post came to mind for affordable and gorgeous countertops. How are the new counter tops holding up? Are they fairing better than the first ones you installed? Just curious because we are seriously considering giving this a shot. Thanks!
The countertops are holding up well! MUCH better than the first ones, yes. They aren’t impeccable but I kind of don’t mind them showing a little wear and tear. You definitely can’t cut on them, and since pine is a soft wood, they can get dinged up if something falls on them or something like that. I definitely wouldn’t put them in a kitchen expecting them to be a permanent solution for years and years, but I stand by them as a decent alternative to buying pricey countertops, if only to hold you over for a few years. If I had a bigger budget I definitely would have sprung for real butcher block, but it just wasn’t in the cards! I also really wanted the lighter, natural tone of the wood, but they’d probably show less wear if they were stained darker, so I guess that’s something to consider.