
This project has been a long time coming, but it’s finally completed. So I’ll stop being such a tease and show you up front. I built a desk!

Yeah, I’m handier than you. Deal with it.
If you don’t want to hear about the process or how I made it, stop reading here. I’ll hate you, but I’ll understand. This is going to go on for a bit. I’ll try to be short on words and long on pictures, but you know me.
So I wanted a desk. Admittedly, I’m not big on actually working at a desk, but in the interest of pulling my life together and becoming a responsible adult, this seemed like a logically symbolic place to start. Plus, my window has a nice view of our rich neighbors’ charmingly overgrown (hey, it’s green) backyard. And their windows (spying). But while my room is pretty big, it’s not big enough to accommodate that enormous PAX wardrobe, a full bed, and a desk. At least none that I could find. I’ll spare you a run-down of my research, but trust me, I’m well informed. They were all too deep. I wanted something long and narrow to make the most of this space on the window wall in my bedroom, but for the life of me couldn’t find anything. I’m not really sure why desks need to be so deep– in my mind, that’s just more room to clutter up– but apparently somebody decided they should be.
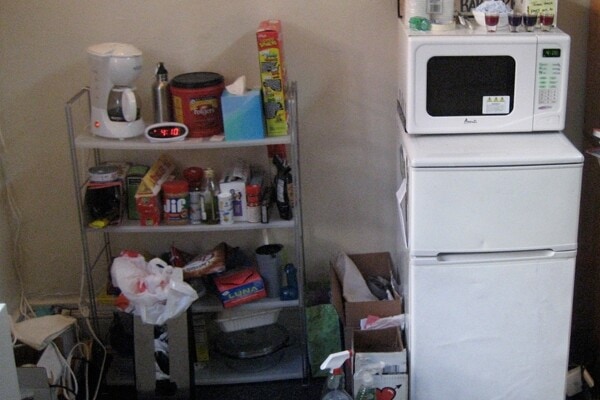
Looking around, I realized I already had the beginnings of a pretty simple DIY. Do you recognize the drawers on the left side of the desk? You’ve seen them before. No? Well, it started out as the stupid little nightstand I pulled off the street for my dorm room way back when.

In the dorm, this thing was fine. To review, I found it on the sidewalk, dragged it back, pulled off the remaining ugly hardware, stained it Minwax Jacobean 2750, and affixed new hardware purchased at the Home Depot. Quick n’ dirty.
In the apartment, however, I knew this little piece of shit wasn’t going to fit in. In the dorm it looked good because– let’s face it– all the other furniture was a gazillion times uglier and it’s pretty hard to develop some kind of style around that crap. But here, I wasn’t about to have its sad, boring lines drag down the apartment’s decor just because I was too stubborn to put it back out on the curb where I found it.
I actually liked one thing about it: the wood. I think the wood, in all its beat-up, “character”-ridden glory is kind of cool. Refer to the first picture and you might see what I mean. So I realized, without the traditional trim on the bottom, there was nothing holding it back from being more workable. And so the saga begins…

I started by lopping off the trim pieces with a hammer. It was sort of exciting and more than sort of messy.

While trim that matched this profile was glued and nailed all the way around, the underlying structure of the sides was also cut this way. Like a moron, I thought maybe I could just use a manual hacksaw to trim it all down to the right level. Boy was a wrong. Stupid, stupid, and wrong. After a while of sweat-inducing, frustrating sawing that yielded nothing but crooked cuts, the blade broke. I cursed the damn thing. I pouted. My plan wasn’t working.
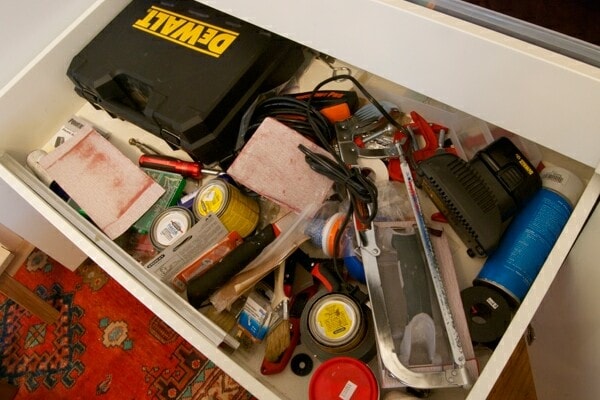
Then I pulled myself together and brought in the big guns.

I rented this puppy for $25 from my favorite hardware store, which I’ll shamelessly plug now. New York Paint and Hardware. They’re awesome. And as their website plainly and randomly states, “WE LOVE AMERICA!!!” Always a plus when renting power tools.

This is what happens when you use a circular saw indoors. Sawdust EVERYWHERE. Is this really what people do when they don’t have balconies, driveways, or yards? I feel like it isn’t, but I couldn’t come up with anything better. Those big wood pieces are from the top, which I also beat at with a hammer until they flung loose.
Once I had that bitch of a frame sorted out, it was time to deal with the drawers. I’ve always quite liked the two-tone look– usually white laminate with wood. Like this desk George Nelson designed up, probably my favorite (or at least in the top ten) piece of furniture ever designed.

Well, now my actual desk looks like crap. Pretend you didn’t see that.
I also wanted to change things up with knobs instead of handles. Mostly because I was dying to use these adorable, cheap SNODD knobs from IKEA that looked bad in the kitchen when I tried them on for size in there. Anna used them over at Door Sixteen in her kitchen and I got jealous. Wow, I’m a creepy shelter blog junkie.

So I gave all the drawers a good coat of wood filler. I used a spackle knife to skim over whole thing, including the old screw holes, so that any imperfections in the wood wouldn’t mar the painted finish. Then I sanded, primed, and painted.

I used this clever little trick revealed to me by Benita at Chez Larsson to make painting easier. Put little nails in the bottom and the paint won’t pool, puddle, or stick to the ground. Then just rip them out when you’re done. It made painting much easier! I used Benjamin Moore Simply White in semi-gloss, which I had leftover from the trim paint I used in the living room and bedroom (and, soon, everywhere else).

Since I destroyed the bottom of the cabinet, I needed to prop it up on something. I toyed with hairpin legs, but I realized I’d be better off with something that was designed to have a height adjustment since the cabinet is an irregular size and the desktop needed to be level. Fortunately, IKEA came to the rescue again with these CAPITA legs, adjustable within a half inch, made for kitchen cabinets.

Once the cabinet was on its way, I went to the Home Depot and got 3/4″ MDF cut for the top. The Home Depot employee might be a total dick about it, but it’s a free service that’s part of their job. So suck it.
This idea was also furnished by Chez Larsson. That’s it, I’m adding it to the blogroll. The top is 5′ x 17″, an inch deeper than the cabinet for some overhang and about a foot shorter than the space between the radiator and the corner, so my new desk would have some room to breath on either side and wouldn’t look too cramped. Ignore that trestle leg, I stupidly bought it from IKEA before I decided on the desktop dimensions and it was too wide– oh well, a $10 mistake. Since a 3/4″ thick desktop would look pretty lame and skimpy and would probably bow over time, I sandwiched two pieces together with a mess of wood glue and some cheap-o clamps.


I clamped in the middle of all four sides. I don’t have any idea if that’s the proper way to do this, but it seemed to work.

After letting the glue set overnight, I rented this sander for $15 from New York Paint and Hardware. A router would have been more awesome, but they didn’t have any for rent. I still love them.
Since the two pieces of wood didn’t join perfectly, I sanded the sides a lot until they were all smooth and even.

I used regular wall spackle to camouflage the small gap where the two pieces of MDF join. In retrospect, caulk might have been a better choice. I sanded, primed, and painted according to instructions from Young House Love, who have lots of really useful tutorials. The basic rundown is two coats of primer, three coats of Benjamin Moore Simply White in semi-gloss, and three coats of high-gloss water-based polyurethane. I wanted the desktop wipeable, water-resistant (since MDF absorbs water and swells up), and shiny.

I picked two VIKA INGE legs from IKEA to finish off the desk. I really considered real hairpin legs, but from a budget perspective, these were a better choice. They have a similar shape to hairpins, and I actually like that they’re a little bulkier to help visually balance things out a bit. Unfortunately the finish is really fugly– like a suggestion of chrome but much less classy– but it was nothing a can of matte black Rustoleum couldn’t handle.
Then I just put it all together and SHAZAM, desk!
Some glamor shots because I’m vain like that:


Hey, you can wake up now. The post is finally over. Except the BUDGET BREAKDOWN. The juicy part. I’m too lazy to put together ALL the factors– every paint brush, piece of sandpaper, etc. I also don’t feel like that’s useful since most people have all that crap already. So here’s the materials breakdown. I already had all the paint, so don’t get your panties in a bunch.
1 4’x8′ sheet of MDF: $30
4 Ikea Snodd Knobs: $8
1 small can water-based poly: $9
2 Ikea Vika Inge legs: $24
1 Ikea four-pack of Capita legs: $12
TOTAL (sorta): $83
Of course, the whole project cost a little more than this for me since I had to buy things like wood glue ($2.72) and clamps ($19.08) and a decent paintbrush for the polyurethane– don’t skimp on this one ($13.97). And the tool rentals ($40). But if you’re cooler than me and have all that stuff on hand, more power to you and can I please move in. What? Nevermind.


omg. you really are my hero. i mean could you be anymore creative and inventive? i love every lit bit of you. every little bit.
xxoo
Awwww shucks! Thanks so much, I love and miss you tons and tons and tons.
Holy shit, that looks awesome.
I may have to blog about this — you okay with that?
Am I OKAY with that? I’m hyperventilating about that! Blog away!
Post is up!
http://www.doorsixteen.com/2010/07/12/people-who-made-cool-stuff-out-of-other-stuff/
Holy, moly that is cool! I love all the details you included and especially the way you glued the wood together – I know nothing about that sort of thing so I’m glad I’m not the only one who just makes things up as I go along :)
Excellent desk! You are cooler than me. I have some power tools and I never use them!
You have inspired me, I’m off to try my hand at using the sander…
I am kvelling. You might need to look that up in your English-Yiddush dictionary.
Holy crap, that is awesome! I wish I were this resourceful, or had your same compulsion to care for my living or work space.
this looks fantastic! Great work! Found your blog from Anna at D16 and will keep reading!
Another new reader who found there way from D16. Will definitely be coming back! Love the desk and the colour of that Eames chair is beautiful!
Great job! Also found you through Door16 and just read the whole way through your blog. Adding to Reader now and looking forward to seeing what comes next – thanks :)
GORGEOUS! I am inspired. I think I may have to blog about this as well (so much better than actually attempting it myself! Blogging is all about living vicariously…) And what the heck were you doing in Regina Sask?
Lisa,
Blog away! I worked as an intern for an indie film company up there for a year. Good times!
I made my way over from Anna’s blog and I am so in love with your desk. It’s one of the nicest diy’s I’ve seen in a long time.
Genius! I love the feeling you get when you’re resourceful and handy and everything turns out great.
That desk is nothing short of fabulous. Like you, I had been looking for a desk for months that would fit a very specific space. I finally found something, but I would’ve been good months ago if I had the guts to attempt building something like this in my own apartment (although I have painted furniture on the patio and sanded in the walkway in front of my door). Kudos for having that vision!
This desk looks amazing! What an inspiration…Thanks for sharing.
WOW. beautiful.
here’s a tip from another apartment dwelling, power tool using crazy (in a good way) person: get a friend and have him or her hold the tube of the vacuum next to the blade of the saw (but not too close!). works like a charm for me! about 75% less sawdust to clean up!
i seriously hope you are a design student of some sort because your taste is too good not to share with the world!
Thanks for the tip, I like that! Now if only I could find some friends that I could wrangle into my manic DIY shenanigans! Then I’d really be in business…
I’m not a design student, but I’m flattered! Eva and I are both in the Gallatin School at NYU, a hippie-dippy lovefest where we just make our own majors from a hodge-podge of classes and then hope we can get jobs!
SHAZAM! This is incredible!
What an awesome achievement. Love your writing style too, you’re a crack-up!
great desk. you’re very clever. isn’t jacobean the best stain ever?
Thanks Donna! I do love that Minwax Jacobean stain– I’ve always heard mixed reviews about how stain adheres to pine, but I love that it’s dark and rich without being red. And it’s so easy to work with. And after staining this nightstand (I mean desk!) a few time over and even getting a little action on some old pot handles, I’m convinced that tiny can will last forever.
Very Cool Daniel Kanter…a long way from that house in Maine a few years back!?
Thanks Mrs. DiGi! How in the world did you find your way here?! And yes, Grampie trained me well in the art of painting (and painting… and painting…). Hope to see you soon!
Wow! You have completely inspired me to make a desk rather than buy, been looking for the perfect one. It’s not out there. And the plug for Value Village in Regina, Sask., double wow! I shopped there non-stop when I was a student. I still do, but in a different city, and no longer on a student budget!
Oh my gosh, I’m so glad somebody can confirm the magic of that place!! Warms my heart so much that I feel like I’m wearing a bunnyhug and snackin’ on dainties. (Canadian code, people, this is between KJH and I)
This is the best! Your explanations and photos will help me if I’m ever brave enough to try this out myself! Also – you are so funny. I laughed out loud (really) many, many times. Thanks!
I just found you through Door16 too.
Great work you have done and you gave me a good idea. Thanks a lot!
That is utterly gorgeous and inspiring! Thanks for the detailed instructions. I’ve been wanting to DIY a desk myself. For a handy-capped person like me, step-by steps are a must. Don’t you just hate going to Home Depot? I hit up the local hardware store as much as possible. They are always so helpful and friendly about it, but they are much smaller so sometimes HD is a must.
Exactly– I’ll go out of my way to avoid HD, but sometimes the selection and size just can’t be beat. It’s not that easy finding a place where somebody can cut a piece of MDF to size in Manhattan, though! But I can’t stand that I feel more qualified to work in a Home Depot than any employee I’ve ever asked for anything. When I asked where the water-based poly was, I was told, “I’m sorry, I’m pretty sure all our polyurethanes are chemical-based.” Oof.
You now have one more reader, thanks to Anna. WOW, I love your writing. And I too have a really fugly night stand, and am in need of a desk. You may have just changed my life!
Thanks so much for the inspiration! My hubby and I are going to give this a try too!
I’m trying to remember how I stumbled upon your blog, but I think it was a friend of a friend’s facebook (unintentional stalking).
Anyway, she posted about your bed, but I think this desk fucking rocks. I didn’t know it was possible to have a Home Depot in Manhattan. I would have put that up there with Walmart (you don’t have a Walmart, do you?).
Anyway, great stuff. What are you majoring in? Any sort of design work? I just graduated from SCAD down here in Georgia for Photography, but I’ve got a couple of friends who studied furniture design and I love seeing what they come up with.
Thanks Chris! Yes, there are actually a couple of Home Depots in Manhattan, although they’re quite different than the massive suburban warehouses I’m used to. Luckily New York has had the good sense to keep Wal-Mart, what with all their employee abuses and union hating out of the city, but with plans for stores in Chicago and possibly D.C., who knows what the future holds. Currently I really don’t know what I’m majoring in (we formulate our own majors in my school), but there’s not really a program for design at NYU. Congrats on SCAD!
WOW, You really have inspired me to do more with what I have at home. I too LOVE trash night at my apartment, I have furnished my prewar( yes us Torontonians do have some cute buildings with lots of character in Canada) digs, mostly of vintage finds and trash cast offs. I really love your DIY spirit and will channel you when I find some lonely discarded piece staring up at me begging me to take it home. Cheers!
OMG! I just found you. You are hysterical. You are creative. You are talented. I will be coming back.
Beautiful job!
unreal! love your writing style and tutorial. great job on the desk. i have a random piece of bowling alley that I need to do something with – you inspire me!!
hi,
I love the end result and especially the way the VIKA INGE legs look – sooo much better in black!
I noticed you were using a hack saw, which are for metal, you might find it easier with a handsaw (i learned that the hard way…)
Thanks for the inspiration!
I am so happy to have come across your site–you’ve renewed my faith in shelter blogs. Like Laura above me I wanted to encourage you to ditch the hacksaw, in favor of a Japanese saw which cuts on the pull stroke instead of the push. They are so easy and accurate. I have been using the same saw inherited from my fine furniture maker-father for the past ten years and it’s gotten me through untold wood projects.
Thanks guys! Yeah, the hacksaw was an awful choice (thankfully I bought it for something else, so it wasn’t a loss, just the wrong tool for the job). Next time I have to cut wood though, and a circ. saw is overkill, I’ll definitely be investing in something better– the Japanese saw sounds like a miracle, I wonder if my little hardware store carries them…
That desk is completely awesome, but the weirdo in me really, really liked the nightstand before it became a desk… Maybe I’ll find its long lost twin along the side of the road someday.
Well done! that’s a great job !!
Hi Daniel! Just wanted to say how incredible this piece is, and how inspiring this post was to read! You are an excellent writer, and I have giggled at least 5 times throughout this DIY. Quick question: I’m thinking of trying a similar project, and I was wondering if you attached the MDF to the drawers or if it’s just sitting on top? I re-read the post a few times to see if you mentioned it, but I can’t find the answer. Much appresh!
Thanks! Yeah, the frame of the nightstand is attached to the desktop from underneath with four wood screws. Send pictures of your project, I’d love to see!
Makes sense! Thanks for the quick response, and I will fo’ sho send some photos upon completion (if the turnout isn’t too embarrassing, unless you find DIY disasters humorous, in which case, I’ll still send them). Thanks again!
hold up. coming out of the woodwork here (faithful reader re-lusting after your desk)-are you from McLean, VA? I grew up there and also have some goodies from the good old treasure trove. so funny!
Yes ma’am I am! I like to stop in after a good meal at McLean Family Restaurant (literally one of my favorite places in the world!).
I just found you from YHL and I love your blog! I wish you were my friend in real life. For now, virtual stalking will have to suffice.
omg I love ur blog!! Have been a ‘Young House Love’ lover for quite a while, but lately was getting bored of them (even though I still adore them).. there r tons of blogs out there, but personalized, centered on one place renovation with affordable stuff is my forte!
thanks Daniel, very inspiring, and I love that you include your mistakes so we can all learn from them too :) you are very fortunate if you didn’t get wood glue on your lovely rug, though.
Love it! Nicely done!
I didn’t plan on restyling an ugly desk today but it happened and I credit you for the inspiration. My friend Monique (a few comments above) tipped me off on your blog and this post really stuck with me. Keep it up! I didn’t actually build a desk, I more-or-less cut in half and added legs but hey, it works: http://bit.ly/hgFpgk
I read the whole thing. I swear I did but I just can’t bare to read it all again to figure out where you bought the legs on the right side of the desk. I know the ones under the left side are from IKEA.
I am BEYOND tickled that friend of mine ‘gave’ me your blog. (Hello, new crush!) I am in the process of ‘building’ a studio out of bulk ‘trash’ and bartered finds. And SURFACES have become my obsession. At the moment I am ‘designing’ a desk (is using old doors contrite? Whatever, FREE is functional in my book). Thank you for your EXCELLENT tutorial, but really, for the quality of your writing which is joyous!
You have inspired me! I’m moving into a new house in a month and I plan on ditching my giant, heavy roll-top desk and I am definitely going to follow your instructions and make own version of this. After I find the perfectly imperfect side table, that is. Thank you tons and tons for this!
holy shizers- this is amazing- can you MAKE THIS for me and i’ll pay you???
ahahaha! I don’t think I’ve smiled and laughed that much at such an awesome, cheeky, spiffy DIY! Thanks for the attitude and the awesomeness.
Will be showing this to my husband to prove that DIY can be bad-ass.
I want to make this immediately. Looks amazing!!! Found your blog on Apartment Therapy and I love it!
Omg, when were you in Regina, Saskatchewan? Did you meet an internet boyfriend that lived there when you were 16 and move there for him? Not that I did that, but it would explain your being there, is all. ;)
wow, I actually read your post. Usually I just skim the photos and put it away in a creepy folder for a later date, but not this time. I read this entire post and loved it. Thank God someone else spies on their neighbors. My roommate and I are thinking of investing in binoculars for the patio… wait what.