There are a bunch of quirky things about our apartment, among them the doors to our bedrooms. What follows is way more detail than you or I ever wanted to know about our doors. But I’m giving it to you anyway. Because that’s just the type of generosity (narcissism) this blog is all about. Here’s a picture of them from before we moved in:
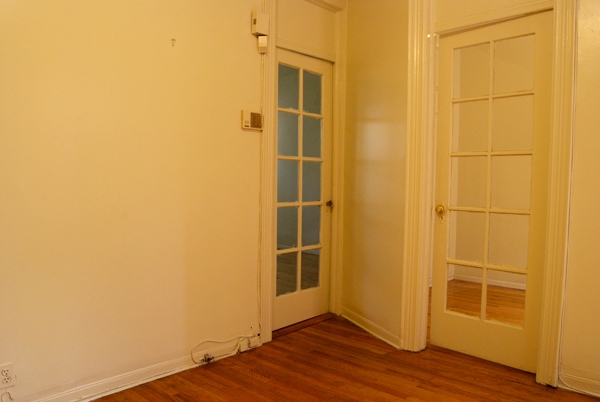
There’s definitely something charming about our old, pre-war doors. I don’t really know how old they are, but they’re solid wood and way more interesting to look at than the 60s hollow-core bathroom door. And the wavy-glass windows let a lot of nice light travel through the apartment, which is a big plus since some of our windows provide sweeping views of brick walls and other peoples’ kitchens. But they’d seen their share of sloppy paint jobs, and for a couple of roommates, the glass doors are just a little weird.
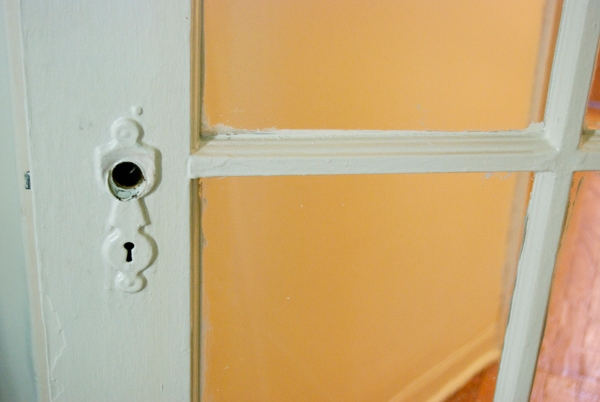
The hardware had all been painted over a bunch of times, and because I like to make things difficult, I decided to take the doors of their hinges and remove all the hardware. Cue the utility knife, paint stripper, putty knife, screwdrivers, and quietly whispered expletives.
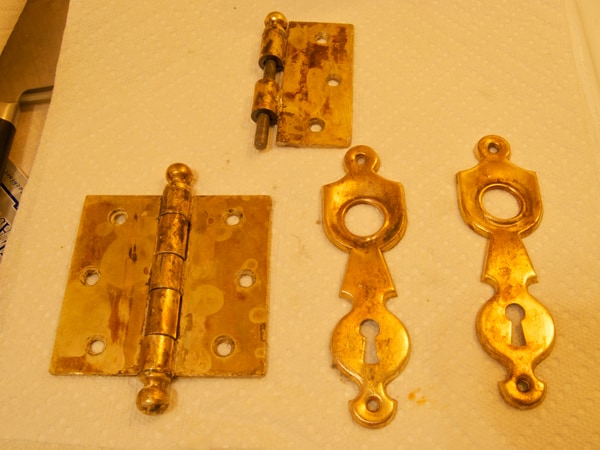
Then I boiled it all in water with some dish soap in a specially designated pot I picked up from the thrift store down the street. This is the cheap-o version of the crock-pot method, but it seemed to work just as well. Most of the paint peels off really easily after it’s all cooked for a while, but the little crevices needed some toothbrush persuasion.
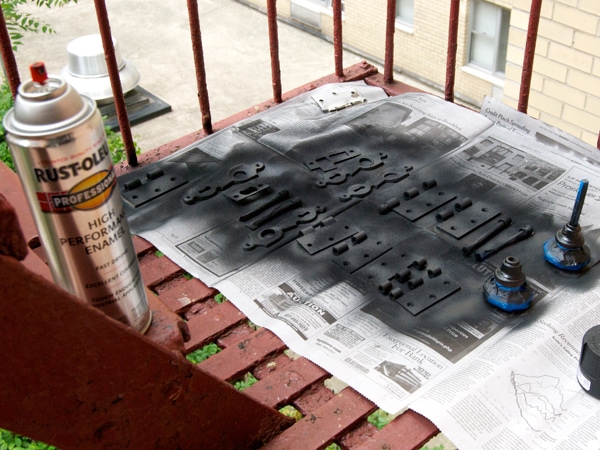
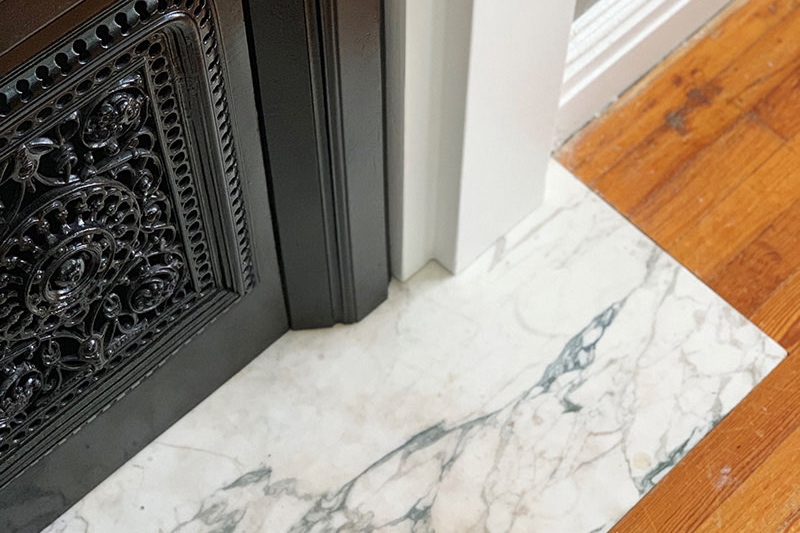
I sanded all the pieces lightly and then hit them with a few coats of Rust-oleum matte black spray paint out on the fire escape. Meanwhile, I was busy painting the doors on our living room floor. It was quite a production.
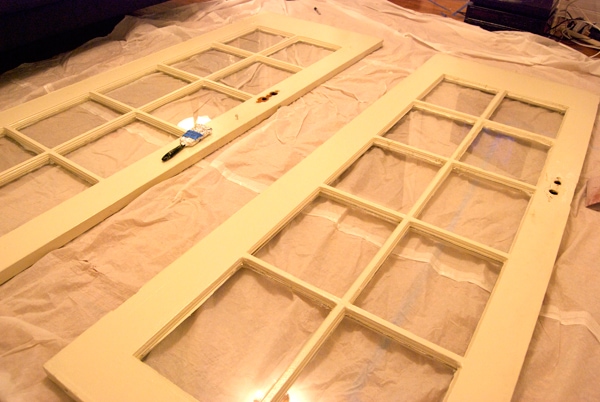
But after the hardware and doors were back in place, none of that work did anything to solve the privacy issue. The obvious solution would have been some kind of fabric curtain made for french doors, but that all seemed a bit frilly for our place. I’d been planning on using frosted glass window film I’ve seen used many times before and have actually used myself. Usually, I’d recommend it: all it takes to apply is some careful cutting, a spray bottle full of soapy water, and a squeegee. It looks great when it’s up, provides privacy, still lets in light, and most importantly is really easy to remove and doesn’t leave any sticky residue. So I bought some (from Ikea, but Home Depot carries wider rolls for a little more money).
But once I put up a few testers on a couple of the panes to see how it would look, I wasn’t happy with it. Because these doors are individual panes (the old fashioned way, y’all) and the glazing around the panes doesn’t form perfectly straight lines like you might find on a new window, there was no way to get the frosting film perfect. It didn’t look terrible, but I didn’t like the way there were accidental slivers of light around the edges or the air bubbles that formed where an edge wasn’t making direct contact with the glass in some places. And those bubbles really only get worse with time.
So I weighed my options. I went back to curtain solutions but that seemed both a little pricey and I didn’t find any I liked, which would have meant sewing. Which I can do, but it seemed like a lot of effort for something I wasn’t really digging anyway. I researched some aerosol spray-on window frosting that doesn’t actually etch the glass, but I read mixed reviews on how removable it was and it didn’t sound very durable (it-looks-good-as-long-as-you-don’t-touch-it. Ever.). I considered double-stick taping on wallpaper or something, but that would have looked awful unless I did both sides, and even then I’m not convinced it would have looked good. It also would have blocked the light.
I had read a couple years ago about a process of applying fabric to walls using cornstarch– a renter’s alternative to the semi-permanence of wallpaper. So I hopped on the internets and found the original post where I read about it and then was reassured by an Apartment Therapy post on the topic that it would be fine for windows as well.
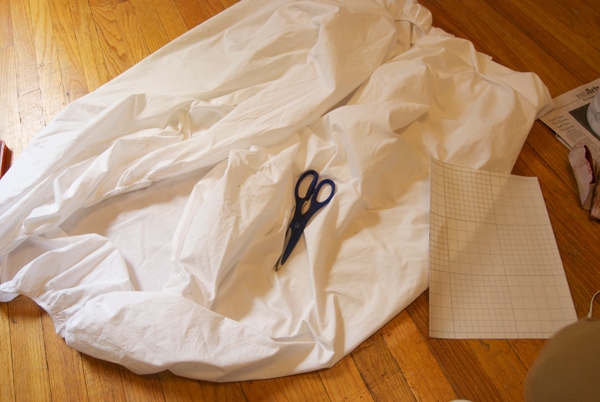
I decided to hack up one of the fitted sheets that I bought for my dorm’s twin extra-long bed, using one of the test panels of the frosted glass as a guide. I just lightly traced it with a pencil and cut out ten rectangles to fit the panes.
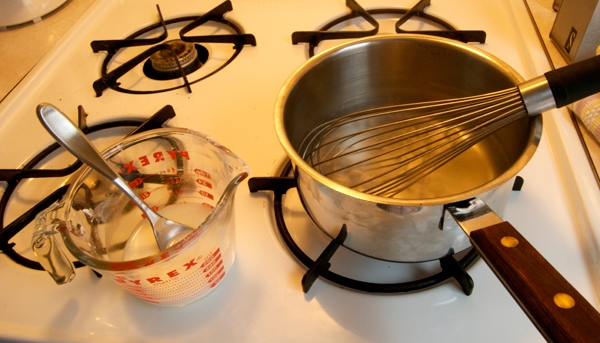
Then I made the paste, which is just regular cornstarch and water. I used two tablespoons of cornstarch dissolved in 1/4 cup of water, and then added it to 2 cups of boiling water. This forms a sort of thin, misty, perverse-looking jelly.
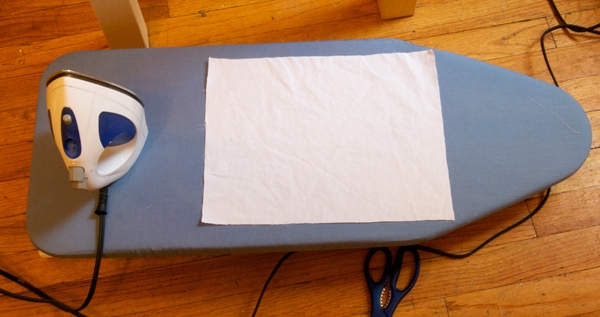
Don’t forget to iron, kids.
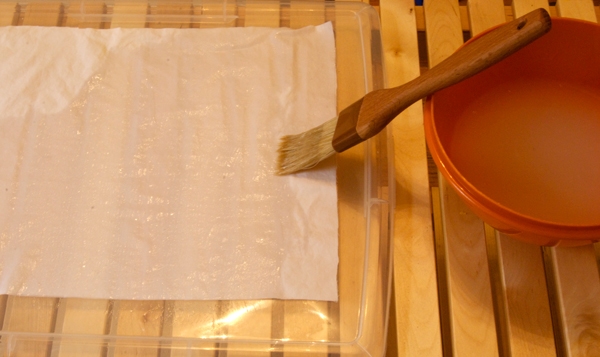
Make sure the windows are nice and clean and apply the paste liberally to the back to the fabric. A chip brush might have been more appropriate than my pastry brush (its first use, appropriately, being for something like this instead of food), but it doesn’t matter. Then slap the fabric into place and use a squeegee (or credit card or anything with a hard, straight edge) to squeeze out bubbles and, as it turns out, lots of the paste you just brushed on. Have paper towels on standby. After that’s done, I lightly painted a coat of paste to the front, making sure to cover the entire surface but light enough that it wasn’t gloppy.
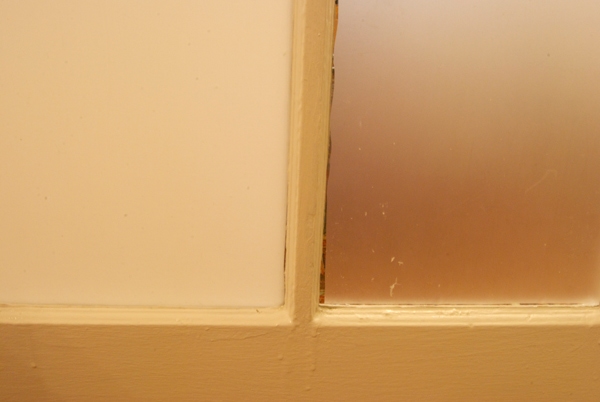
The fabric is much more forgiving than the film, as you can see in this side-by-side (fabric on the left, film on the right). I did cut the fabric slightly bigger, but you don’t have to worry about it bubbling around the edges because the fabric will stick to anything.
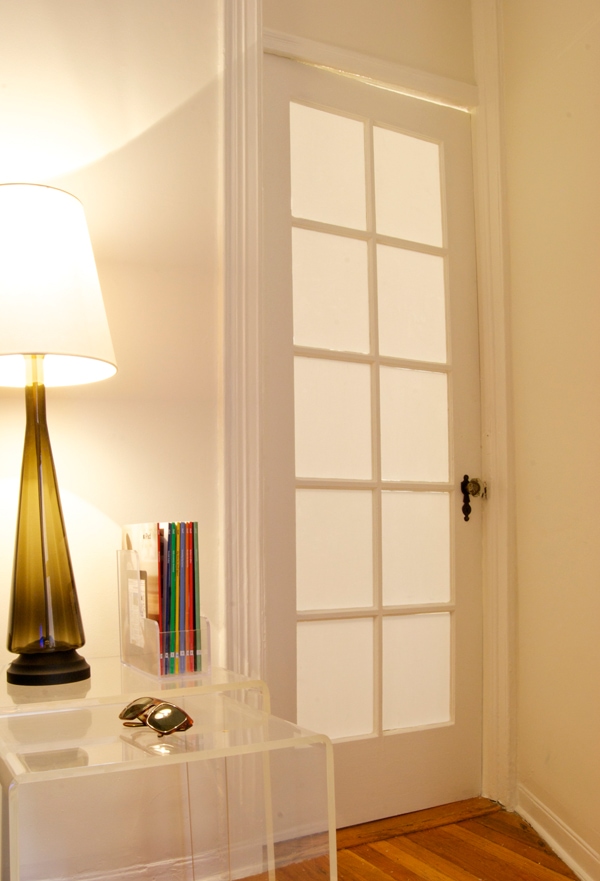
And here it is today after it all dried overnight. I can report that the starch seems to be holding really well and doesn’t look crusty or weird. And while a couple of the panes could use a re-do with a slightly bigger piece of fabric, I’m happy with how it turned out. Even more privacy than the window film, still lets in light, fully removable, and no harsh chemicals or specialty products. And not counting the previous cost of the window film (about $6 if I remember correctly), the whole project only cost $1.99 for the cornstarch, of which I still have plenty for the next time I whip up a refreshing vat of gravy or remove some errant blood stains. Plus, the project was so easy that we can change it up with a different fabric at some point in the future. But for now, I’m just going to go lounge around naked in my room.




Love the fabric covered windows. Lovely process. Up until the last line I was completely engaged. :) xxoo
Thank you! Obviously there will be no nudity, I just didn’t want to disappoint the crowd who reads for the risque subjects I tackle. Just tryna please.
Your Grandfather, my dad, was always puttering around with stuff. More with cars and fixing stuff than the decorating thing, but he is looking down and getting such a kick out of you and your projects. You got that gene from him.
*just lovely*
Dan, your apartment is looking great!!
the door looks fab
I have used this method on my living room wall to cover wood paneling. But I love this idea of using it in this way. It turned out fabulously.
I love you enthusiasm for details!!! It’s so nice to know that there are other people in this nutjob of a city who geek out over removing the paint from their door knobs in a rented apartment. You give me the courage to sand down my caked on, dried-while-dropping paint from my window frame and repaint… Great blog, thanks for sharing with us.
Flippin excellent idea! Gonna give it a go…somewhere? Apartment looks great, thanks for sharing.
Reminds me a little of shoji, which I love. Very nice.
Living in South Texas, my first thought was, If I do this, will the cockroaches be hanging out eating the cornstarch?
Oh, believe you me, cockroaches are no laughing matter in New York either! Since you actually use such a small amount of the mixture in the end (most gets removed when you squeegee the fabric onto the surface being covered) and it dries really quickly, I don’t think this is something to worry about. At least I haven’t noticed anything snackin’ on my doors.
I love your fabric window solution – so clean and practical! Did you notice any change in the color of the fabric with the cornstarch mixture? I’d love to try it with a patterned fabric at my house.
Nope, I didn’t notice a change in color at all! I was definitely concerned about things getting kind of yellowy and crusty over time (especially with the white fabric), but that didn’t happen at all. Go for it!
I will have to keep this in mind when I am redoing my doors in the craft room. While they don’t have windows, they do have slats and it might be interesting to apply fabric to a few of the slats.
I covered the glass window in my back door using some beautiful textured white handmade paper and PVA glue. It looks great, but it’s not removable, I shouldn’t think. But now I’m wondering how cornstarch would work with paper. I’m thinking a squeegee wouldn’t work, it would just have to be brushed on….
This is amazingly cool. Our front door is like that. No kidding: you can see right into our living room from the street. I love the light in the winter but the lack of privacy drives me nuts! If I’m getting dressed and realize my skirt is in the laundry room I can’t just run there from the bedroom because the FedEx man might be driving by. Or if some JW’s are at the door and I don’t want to answer it, especially when I’m sick and wearing jammies all day, then I have no place to hide. I don’t know how previous owners dealt with it but I hate it. A new door is too expensive, but this sounds like a great idea. Thanks!
What a brilliant idea – Thanks so much for sharing.
Am I right assuming that this method for will not work for the window in my shower? I have an awkward relationship with my neighbors, as they see me showering every morning–although it’s only from the shoulders up.
So do you think this would hold up to some heat and moisture or do I need to look for another solution?
I think it would be fine with the heat and moisture, although I can’t speak from personal experience. You’d probably run into trouble if it were actually getting wet, but otherwise I doubt you’d have a problem.
Hi — Well, I like your problem-solving and your work. If one of my tenants did this, I’d be fine with it.
But, here are a couple of tips:
First, rather than use just boiling soapy-water to remove the paint on the hinges and other hardware, try using vinegar, instead. We’ve found that simmering the hardware in vinegar for a couple of hours loosens both latex (water-based) and enamel (paint thinner-based) paint, and doesn’t discolor the metal. Yes, sometimes we need to do some ‘preliminary’ scraping-off of the loose paint so that the solution can more easily reach the still-hard layer(s) underneath, but this just takes a minute or less for each piece using a stiff, plastic ‘dish-scraper’ and an old toothbrush — avoid getting burned by the liquid by wearing gloves, scraping the parts in a bucket of cold water, etc. It’s amazing how many layers of paint can accumulate over the years on the hardware in old houses.
Second, the landlords I know are willing to let tenants make small ‘improvements’ like this, but asking for permission first is the courteous thing to do, and is required by most month-to-month rental agreements and annual leases. If you feel that getting an OK may be ‘iffy’, ask the landlord (or manager) to look at a sample of your work before making a decision. If you don’t have a sample, make one using materials from a second-hand store in a before-n-after presentation. If this is not the first time you’ve been able to do this type of thing, show the landlord your before-n-after photos and your ‘Golly, I’m pleased’-letter from your prior landlord. (If you don’t have any, take before-n-after photos this time, and pre-type a letter for the landlord’s signature of his OK — you’ll need at least the photos to protect yourself, anyway, right?)
Good luck, and may you always rent from ‘reasonable’ landlords! — Bob
Excellent ! 100% Natural & easily removed when needed — I will remember this one.
Thanks for sharing
This is a great idea, one that I will definitely try. When I stop being lazy. Which could happen.
Cheers on a fun blog.
So will it flake off for any reason? Opening/closing a window, cold, heat, etc?
Can you touch it, or brush up against it with daily use without problems?
I bet it would be cool with patterned muslin too!
Thanks for sharing your efforts and project!
Personally, I haven’t had any problems AT ALL. The second time I did this, I actually didn’t re-paint with more paste over the squeegeed fabric and the hold on the glass seems equally strong. I’d imagine it might not last as long if the surface was getting wet a lot, but I haven’t noticed anything from just normal wear and tear– i.e. brushing up against it, running a vacuum over the mullions, that sort of thing. And the great thing is, even if it did start to peel, it would literally take about five minutes to just touch up that part with more paste. It’s really quite durable, I swear!
Is it water-proof? Can I use it to frost a bathroom for example? (The walls are glass)
I don’t think so. I’d bet that it would stand up pretty well to moisture or humidity, but not actually getting wet.
I absolutely loved this! Followed your directions and covered my son’s street facing windows with a white on white patterned fabric, they look amazing :) Thank you!!
Is this advisable to use on regular windows, in an apartment? How opaque is it. And how much privacy will it provide at night, with say the lights on?
It could definitely be used on regular windows and I’ve seen several people around the net do that! I might stay away from bathrooms because of the humidity, though (I don’t KNOW if it would be a problem, I’ve never tried it). The opacity will depend largely on the fabric you use, but I think mine provides quite a lot of privacy while still letting light through, which was the goal. Might be able to see some movement and shadows, but I’d say it’s about as private as most curtains except for ones designed to block light entirely. Hope that helps!
For people who asked about doing this in the bathroom, I used clear patterned contact paper on the showers in the bathroom. The shower glass doors were always soap scumed and I hated it so I installed the contact paper and it has worked like a dream. Of course now I have the Pscycho problem as I can’t see someone coming at me with a butcher knife in hand in the bathroom.
Thanks for the inspiration! http://collectedideas.wordpress.com/2011/05/23/french-door-coverage/
linking to this awesome immortal post.
http://www.flickr.com/photos/purejuice/6063394980/in/photostream/
I love this idea. I’m trying it this week with our failed ikea window panels on our bedroom windows. Yes, the whole window.
Thanks for the details!
I just did this on my teeny-tiny basement bathroom’s window (the shower in there hasn’t been used in 2 years, we’re not concerned about humidity) and it worked like a charm. It looks fantastic. Thanks so much for the how-to!